Installation (continued):
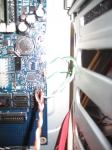
As stated earlier, some vendors (not Quiet PC USA) conclude that the Cupio 6140 will hold a Full or Extended ATX motherboard, and the suspicion holds due to the markings on the motherboard mounting area. So the only E-ATX motherboard that I had available was attempted for install â" a 1997 ASUS P2B-S which in a previous life was used for server duty. To my surprise, the board did fit. However, it did take some planning to install; the entire top panel wiring harness must be moved up toward the top of the unit for clearing such a wide motherboard, and I couldnât make the board fit with the I/O shield in place â" rather I had to âdropâ the board in place, then slide it slightly under the bays to mount the I/O Shield. But it does indeed hold an E-ATX board. As you can see from the second picture, space is very tight between the 12 ½â wide E-ATX motherboard and the drive bays.
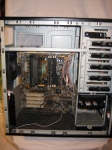
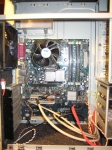
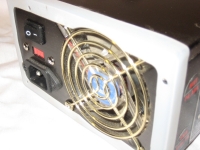
Now that the issue of Full/Extended ATX is over, weâll build a more up-to-date system. Building a computer inside of the Gigabyte Cupio 6140 is quite pleasurable, with limitations. Remember, this is a mid tower case â" massive 6-drive RAID systems need not apply. The first order of business was the mounting of the power supply. I utilized the supplied Fansis PSU Gasket, which fits over the rear of your power supply, and then the PSU is mounted. I chose to mount the Anti-Vibration kit with the silica washer on the outside, since logic dictates a sandwich of silica will not transmit vibration noise. There is a small shelf support for the PSU, with elliptical âspringsâ to help keep those extra-large power supplies from sagging without transmitting vibrations to the rest of the case.
After placing the PSU, I drove the standoffs into the backplane and mounted the I/O shield. Before placing the motherboard, the entire top (named it correctly this time) panel connectors were placed, except the eSATA for now. Maneuvering the motherboard was much easier than the Extended-ATX board tested earlier. There is also quite a bit more space between the motherboard and the bays, as the second picture shows. A quick tightening of screws, and weâll check the tool-less features.