| View previous topic :: View next topic |
| Author |
Message |
jedihobbit
Rated XXX

Joined: 22 Mar 2007
Posts: 238
Location: Central Virginia, USA
|
 Posted: Fri, 04 Apr 2008 01:45:12 Post Subject: DreamCatcher Worklog Posted: Fri, 04 Apr 2008 01:45:12 Post Subject: DreamCatcher Worklog |
  |
|
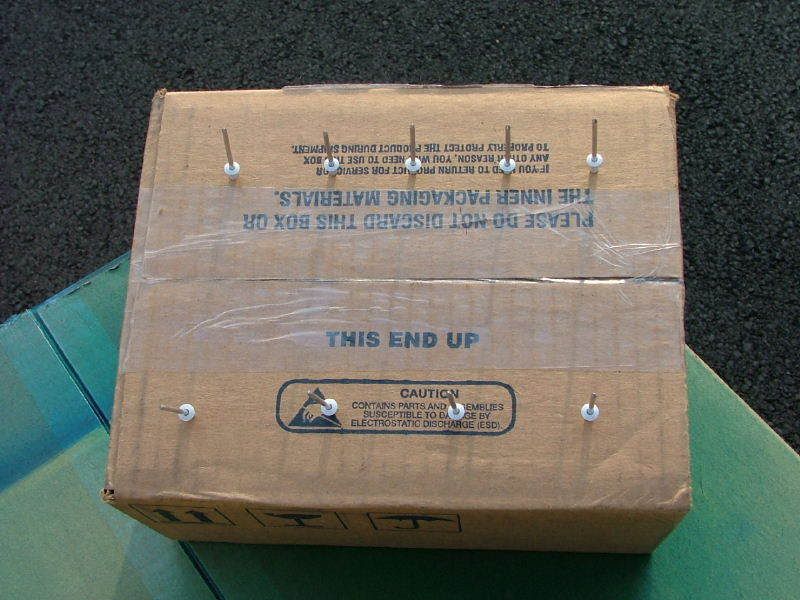
 For those of you looking at my worklog for DreamCatcher v2.0, this worklog covers everything up to that point. While this isnât âcurrentâ it shows most of the modding that went into it originally. For those of you looking at my worklog for DreamCatcher v2.0, this worklog covers everything up to that point. While this isnât âcurrentâ it shows most of the modding that went into it originally.
Somewhere Around late February â Early March, â07
As fate (also known as eBay, newegg open box, MIRs, etc) would have it a computer build has been reborn. A system christened DreamCatcher last year and was to be an abit NF7S / 2500+ Barton build was abandoned in a âpeace overtureâ to the wife, but now it has returned.
Here are the system specs:
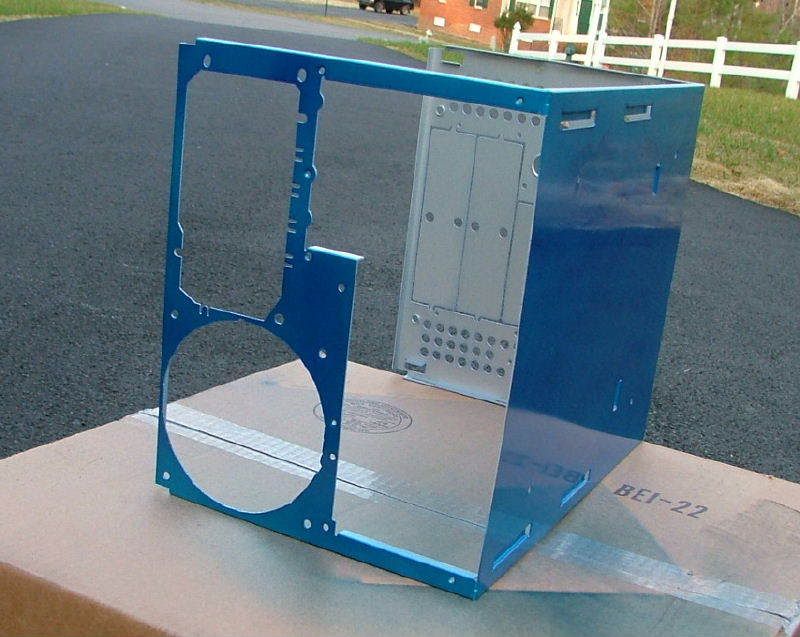
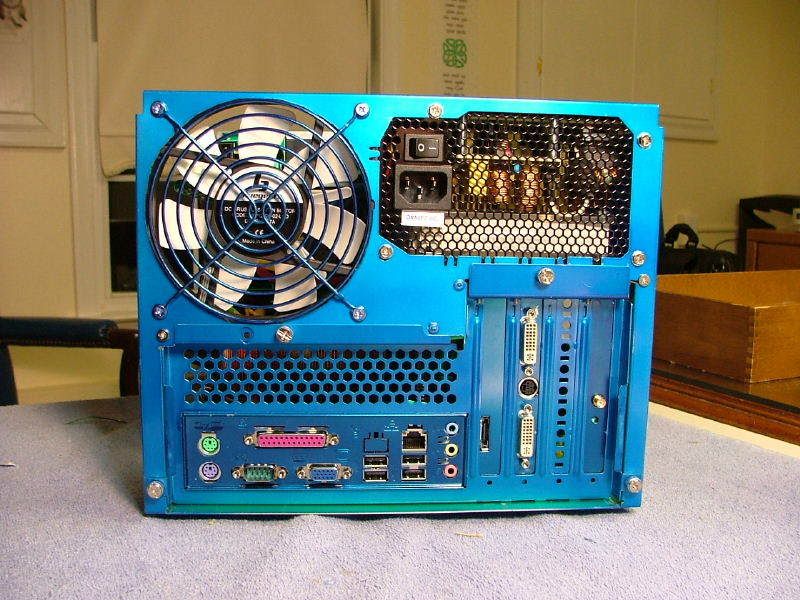
CASE: Ultra MicroFly mATX, Blue, w/o PSU
PSU: Enermax Liberty ELT400AWT 400W**
MOBO: Biostar Tforce 6100-939
CPU: AMD Opteron 165, CCBBE 0610
HSF: Zalman CNS9500
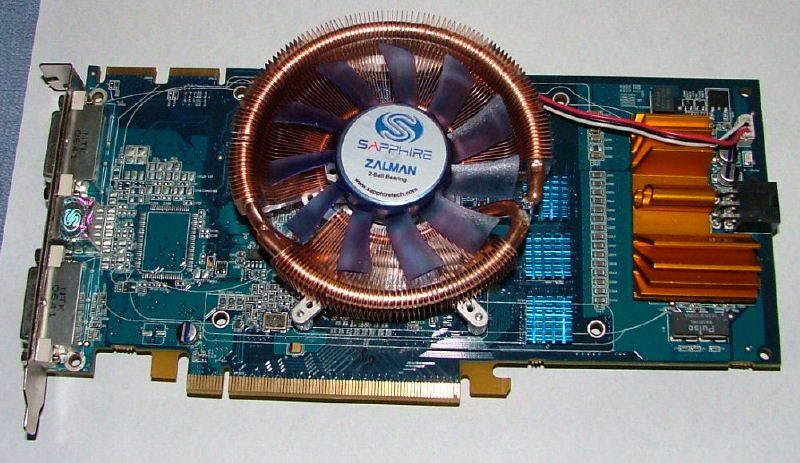
GPU: Sapphire X1950 Pro Ultimate
MEMORY: g. skill F1-3200PHU2-2GBZX (2 x 1024)
HDD: WD Raptor X, 150 Gigs
Optical Drive 1: Asus 52X CD-ROM
Optical Drive 2: LG GSA-H42N-BK, 18X DVD+R Burner
** Could be upgraded to 620W if deemed necessary.
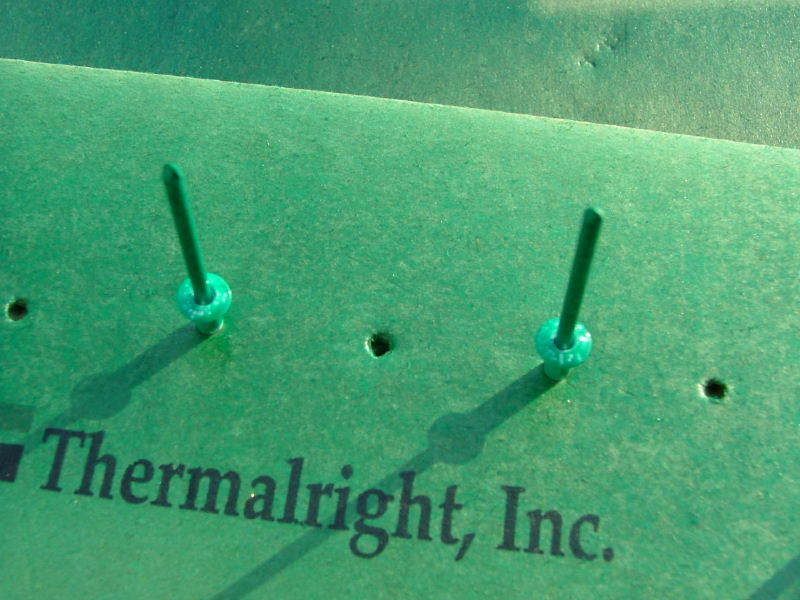
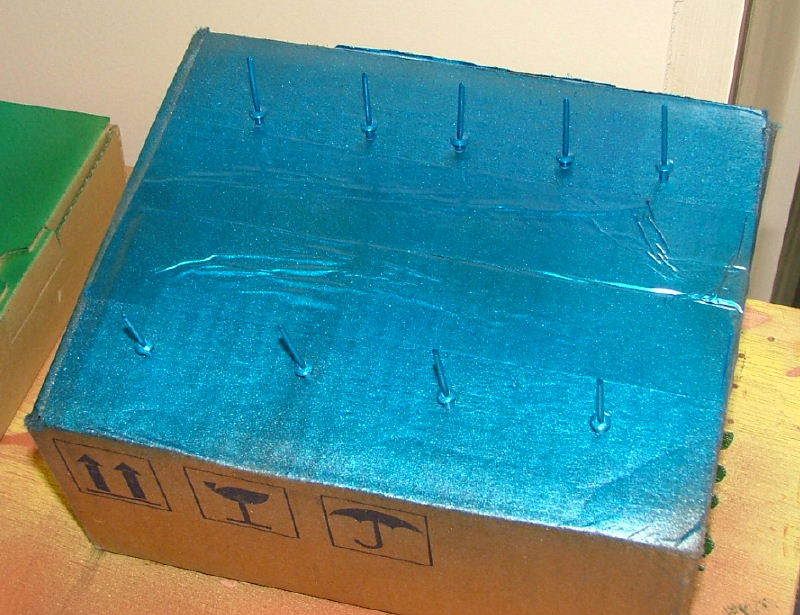
Here are the parts!
For the case check here: http://www.ultraproducts.com/product_details.php?cPath=13&pPath=439&productID=444
As the MicroFly comes with windows on both sides and top and a real nice exterior blue paint job, case mods may be at a minimum. Currently under consideration are:
1. Remove front and rear stamped case fan grills
2. Paint the chassis, mobo tray, and other related items.
3. Replace front 80mm fan with LED type; color TBD dependent on interior color pick.
4. Sleeving PSU and going with an acrylic cover and matching LED fan
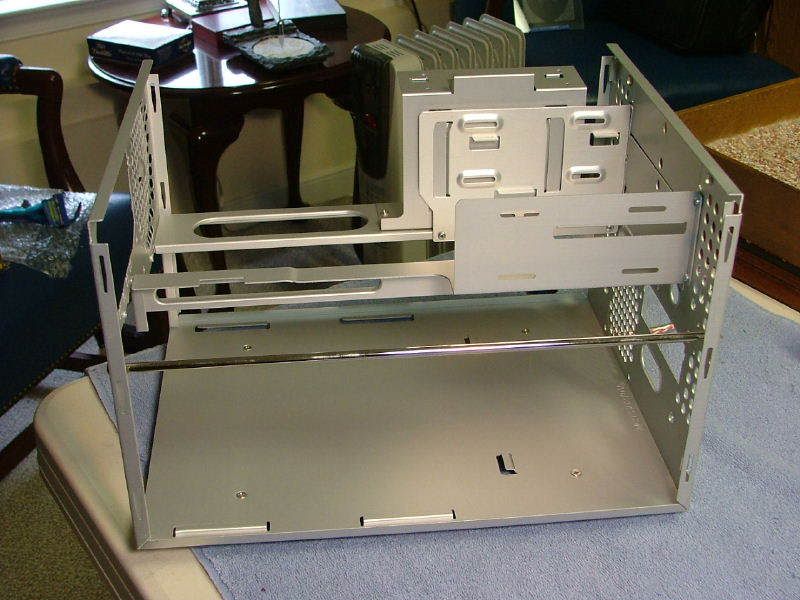
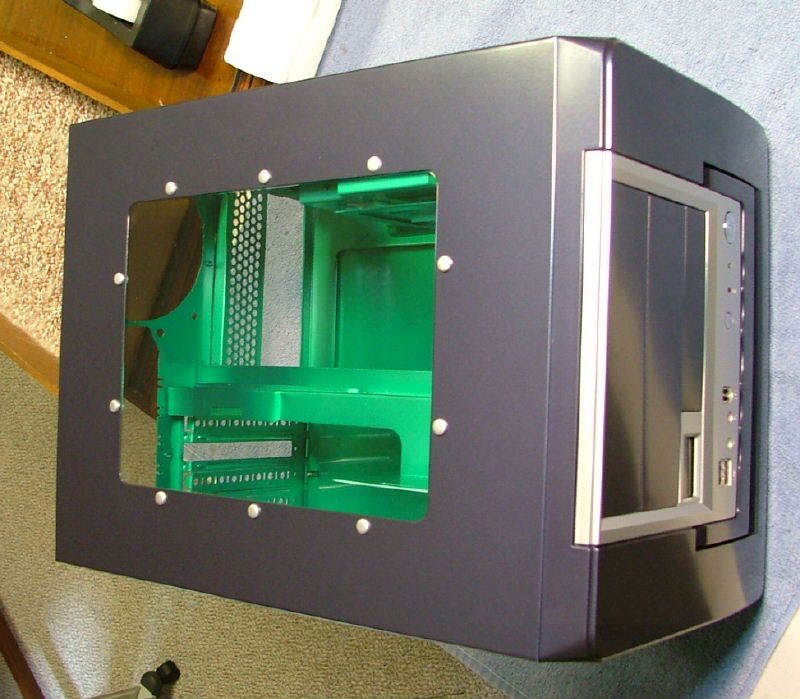
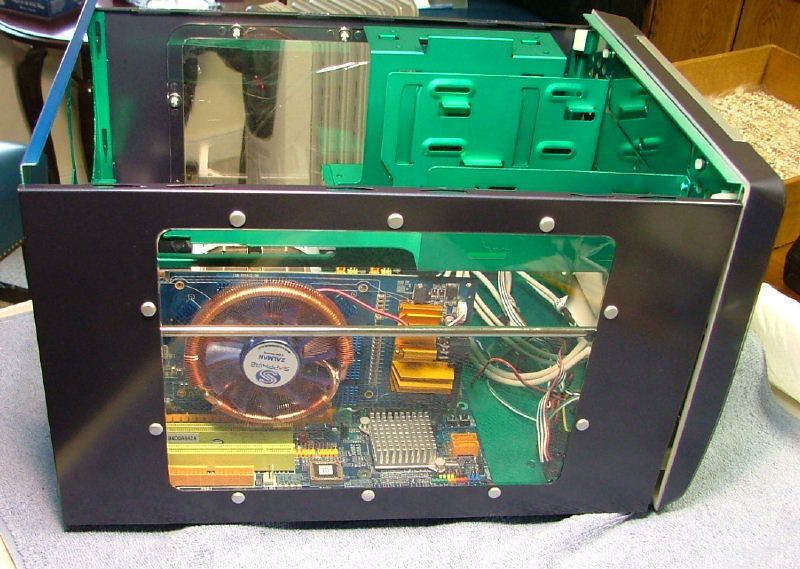
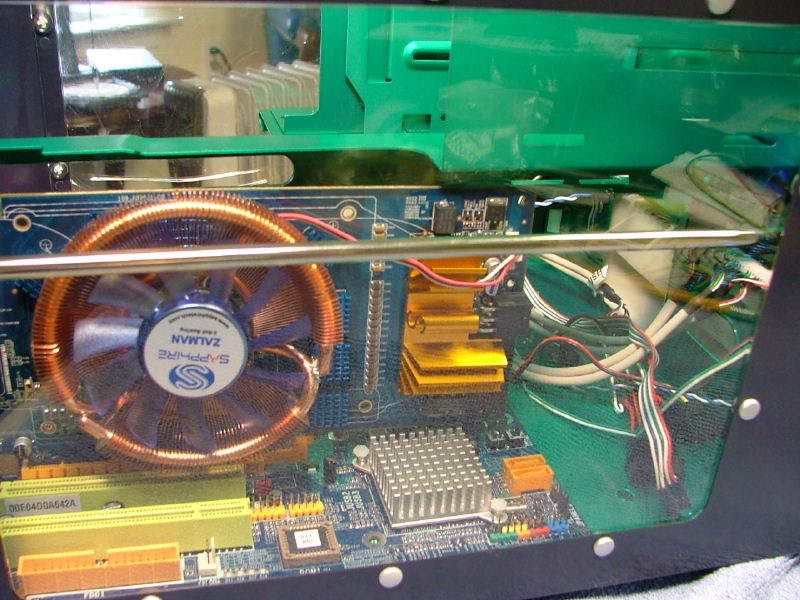
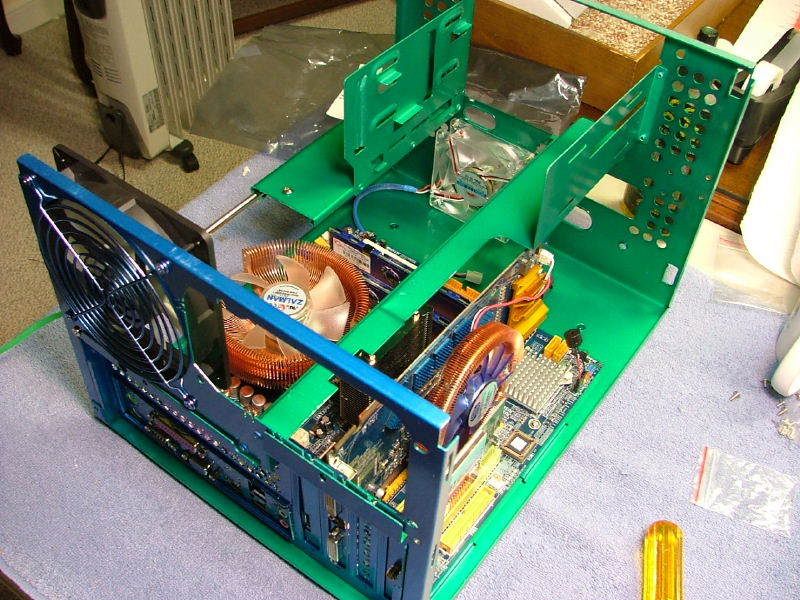
This is my first aluminum case and it feels âfragileâ to me. Then again it is aluminum! I really like the case as it has a removable mobo tray (my first), temp gage, very nice paint job, lots of windows, easy interior access, and on and on. One of my biggest gripes in doing a custom case has been that GPUs can come with all kinds of bling, which ends up facing down. With the MicroFly, the mobo sits flat and one can see the Video card through the side window.
Initial fitting concerns centered on the GPUâs Zalman based cooler, the PSU, and the bracing in the chassis. As you can see with the first fitting the cooler does clear the PSU (barely) and any internal bracing. However, when removing the mobo tray the cooler hits the top of the opening. It appears that anytime the GPU needs to be removed, the PSU will need to be removed first.
 
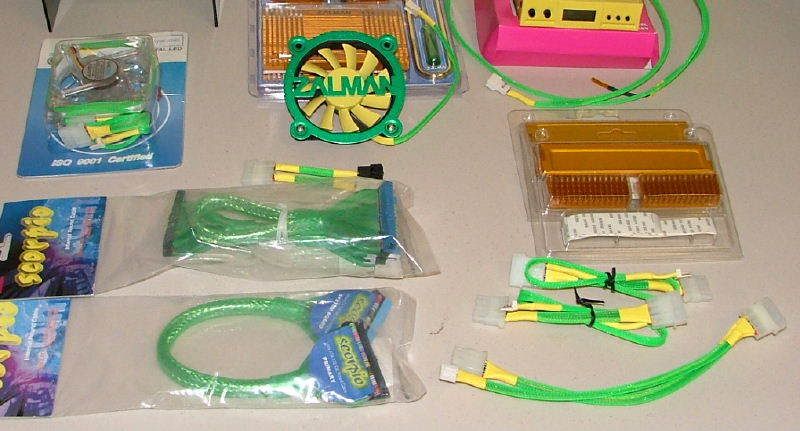
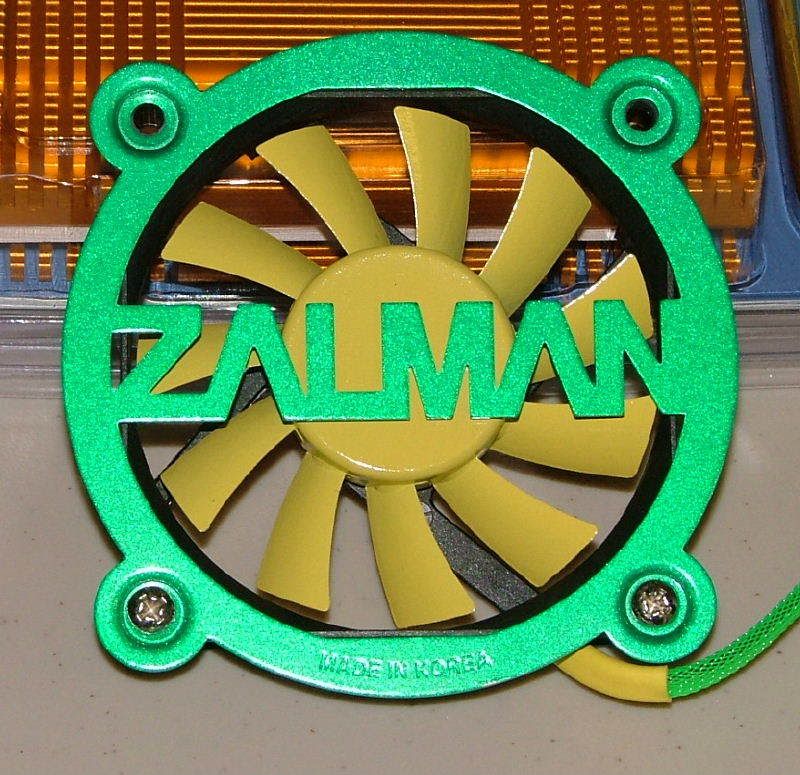
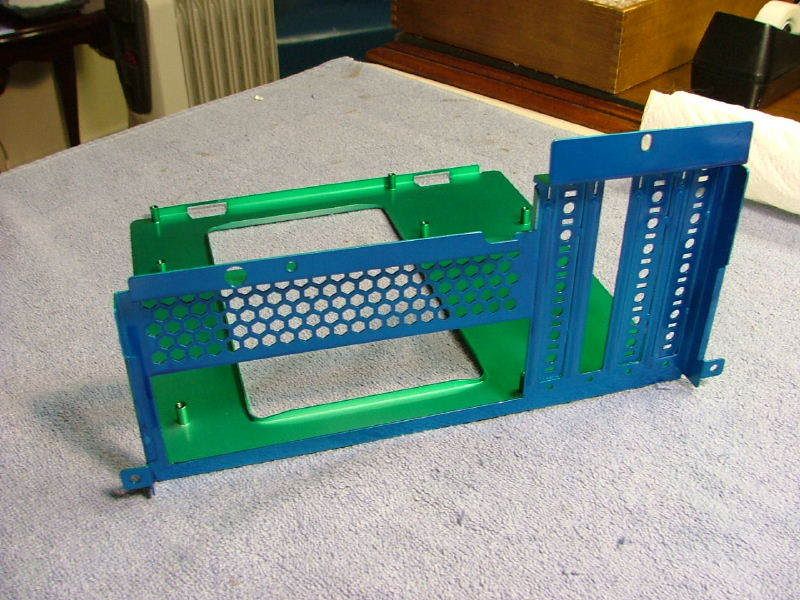
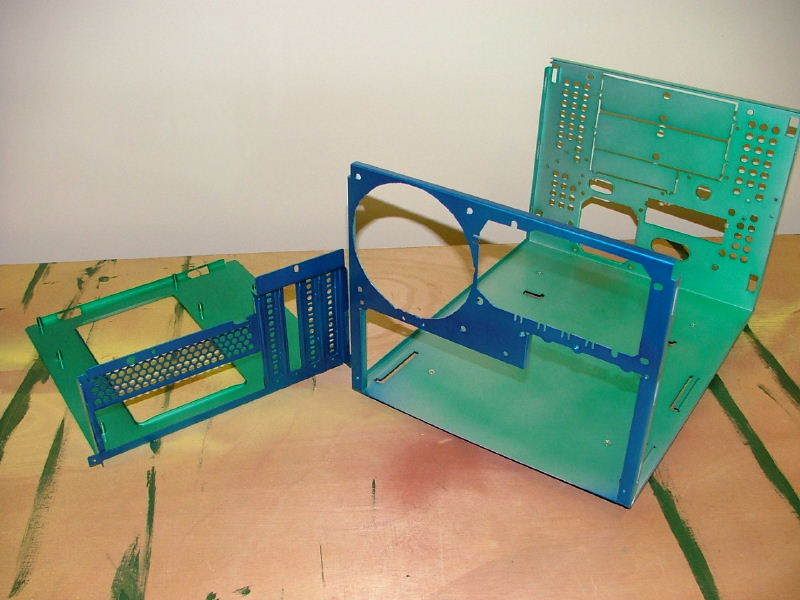
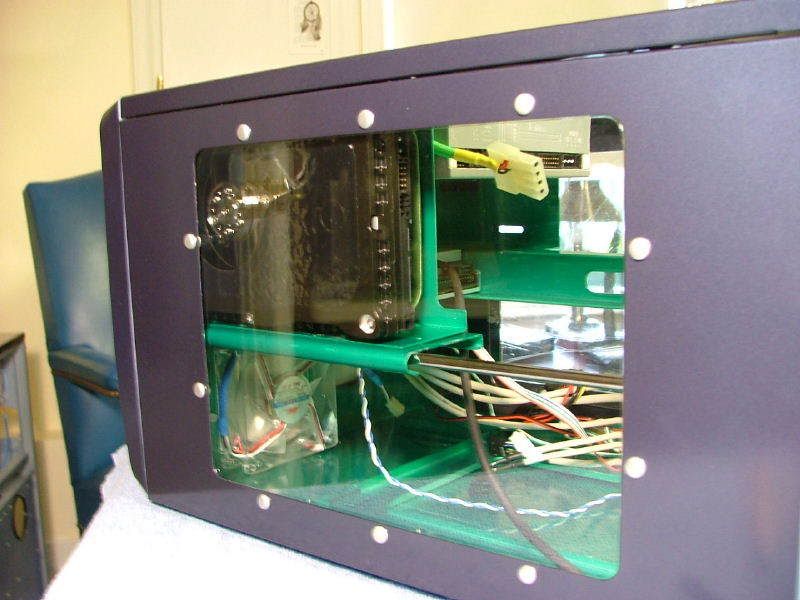
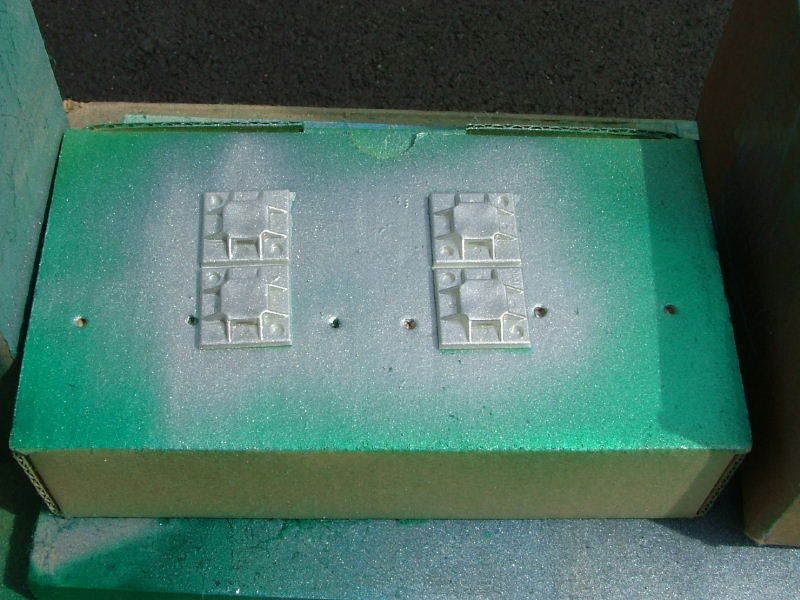
Trying to decide on the color scheme of the interior and have been contemplating using some of the components I still have lying around. These are from what was supposed to be an upgrade for the wifeâs original computer. As that theme was green and yellow was wondering how an âanodizedâ interior with green and yellow components would look with a blue exterior. The two fans and PSU fan would go to green LED. Attached are some pics showing the parts and the zalman fan is painted the green Iâm talking about.
Without Flash:

With Flash:
03/14/07
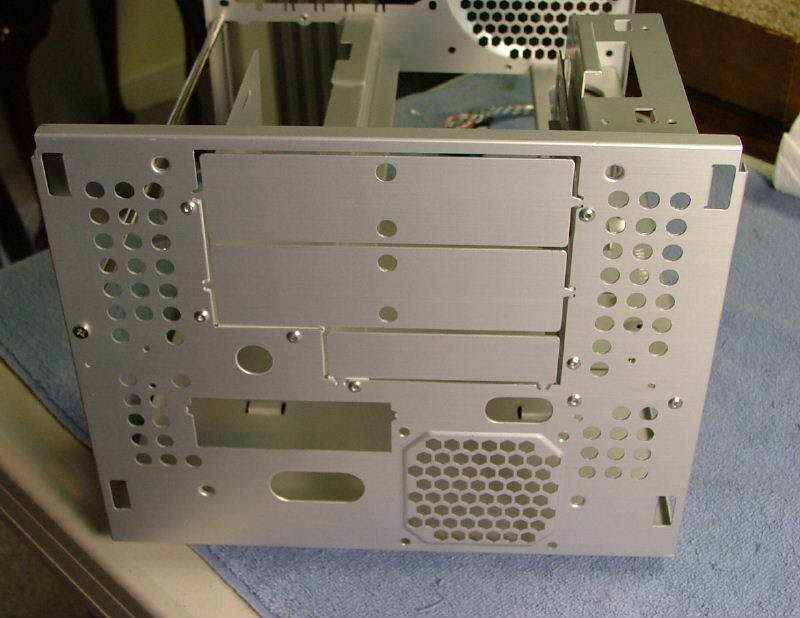
For those of you who arenât acquainted with the MicroFly here it is âneckedâ awaiting me to chop and paint >> Front, Left Side, & rear.
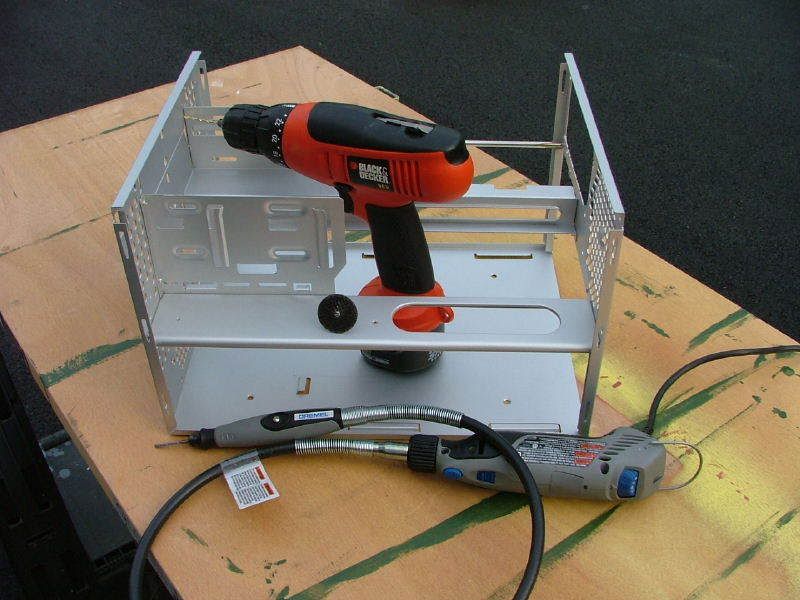
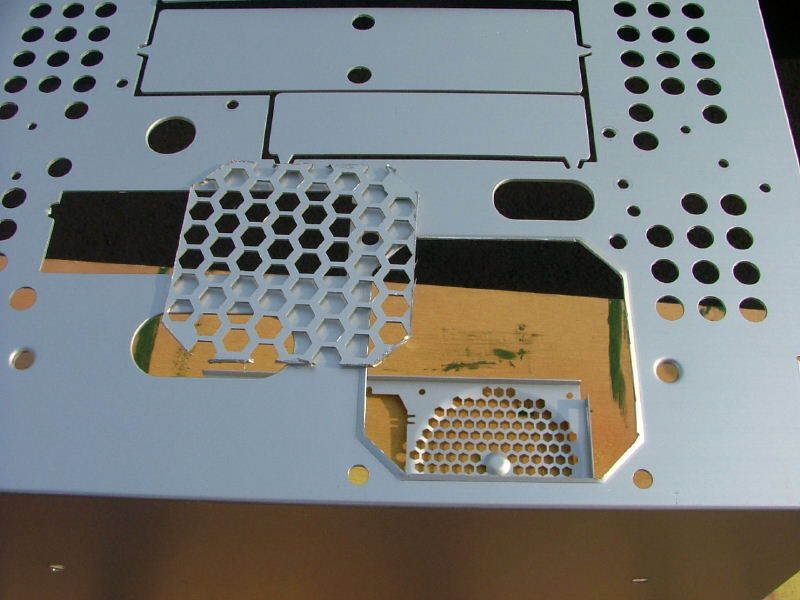
Okay, after everything and their uncle tried to get in the way it is time to get started! The plan is to de-rivet first, cut out the stamped fan grills, and anything else I can come up with (danger dremel in hand!).
Didnât take any pics while drilling out the rivets - so here we are done, and getting ready to start cutting.
 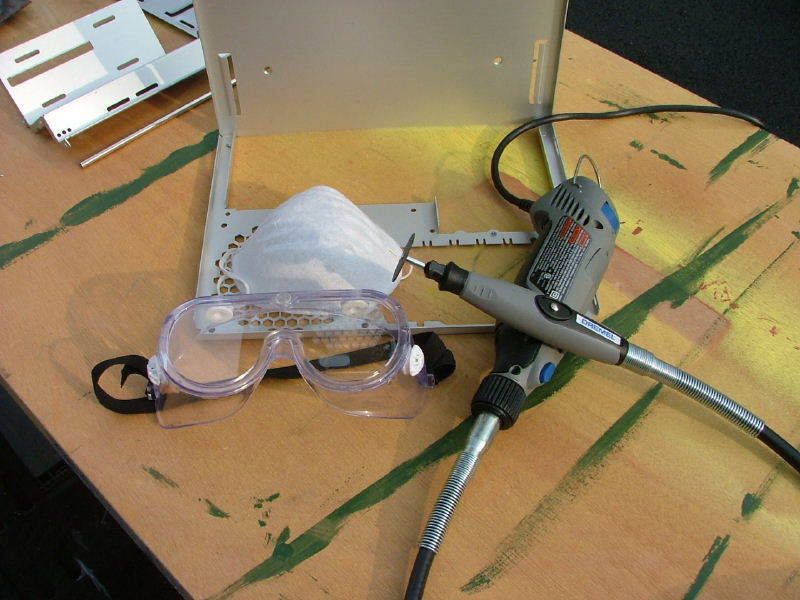
Wanted to do the small hole first as it will be good practice as Iâm used to steel and it is âout of siteâ. Starting out with one of the âlargeâ fiberglass reinforce cutting discs (love these thing on steel!). First thing I noticed is that aluminum will âmeltâ a little at 10,000 rpm. The cleanup reminds me a little of cutting acrylic, anyway first hole done without incident. Had to revert back to the standard cutting disks (they donât last worth a tot, even on aluminum!) , oh well.
I have found that while cutting with the dremel/disc thing - supporting the work like I do with a jigsaw makes it easier (for me anyway) to cut neater.
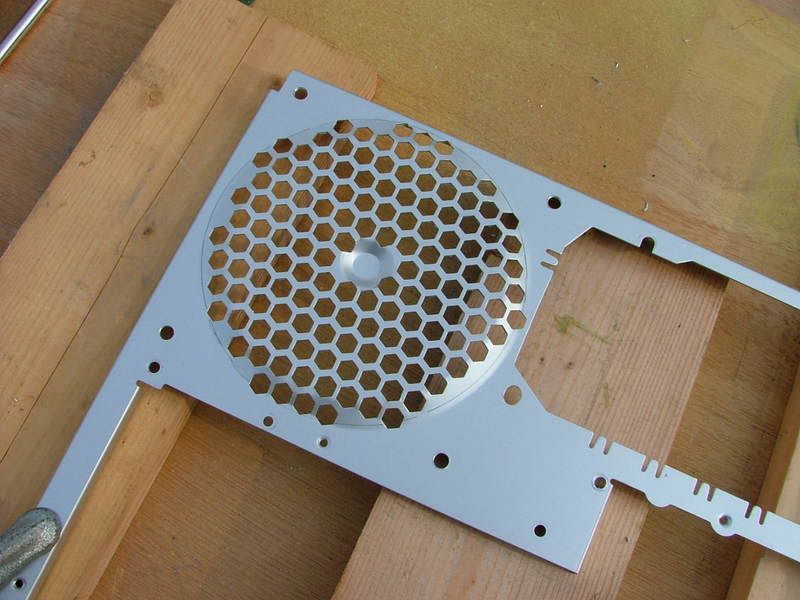
While I was trying to cut the large grill out I had to cut it away in âpiecesâ to make my arc work. Was not too pleased with the quality of my work on this cut but it is serviceable. Thanks again to the man who invented the file!
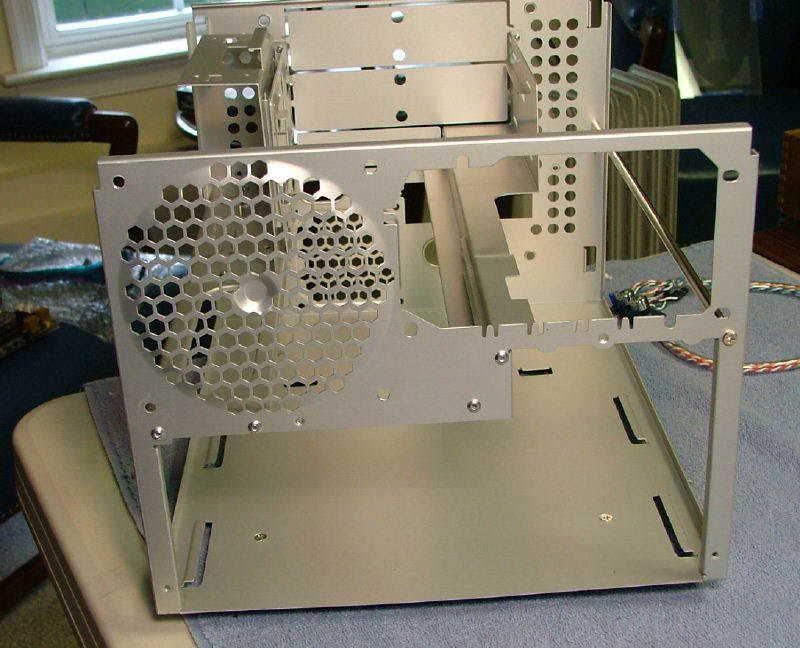
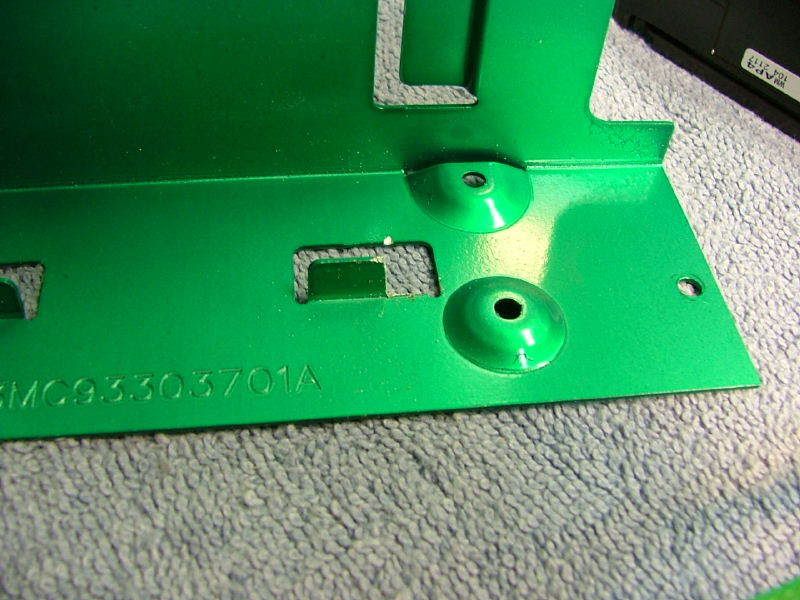
ULTRA jon over at ultraproducts.com/forums was showing me some of his mods to a MicroFly, one of which was to remove the brace that supports the HDD (right hand side facing the case) and using a support rod as on the left hand side of the case. Decided I wanted to do the same, but am a bit more paranoid. So this is my version >> use the rod and half of the sheet metal brace. Because of using the rod as one of the attachment point I needed to notch out the outside part of the flange with the ârivet holeâ.
Then using a piece of wood to hold up the side that will be riveted to the front gave a look-see and it is what I wanted.
Well all the cutting and drilling are done and here be da scraps!
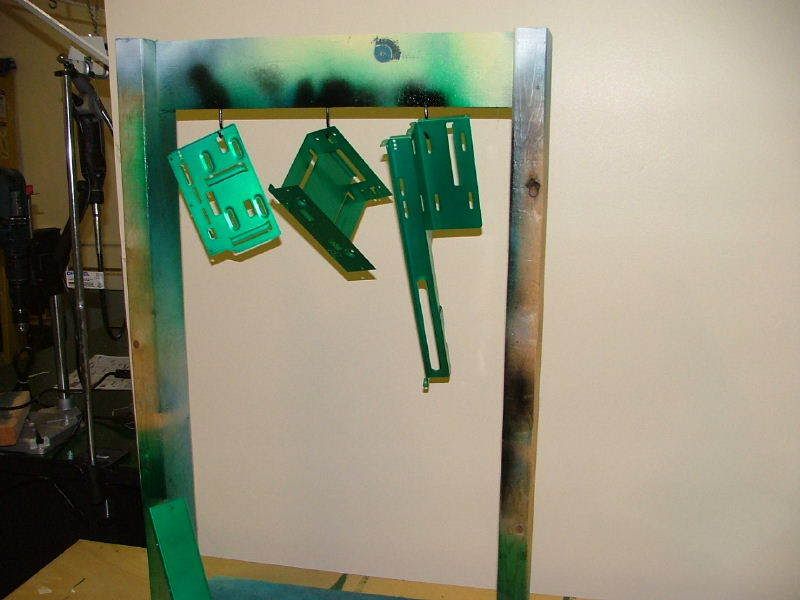
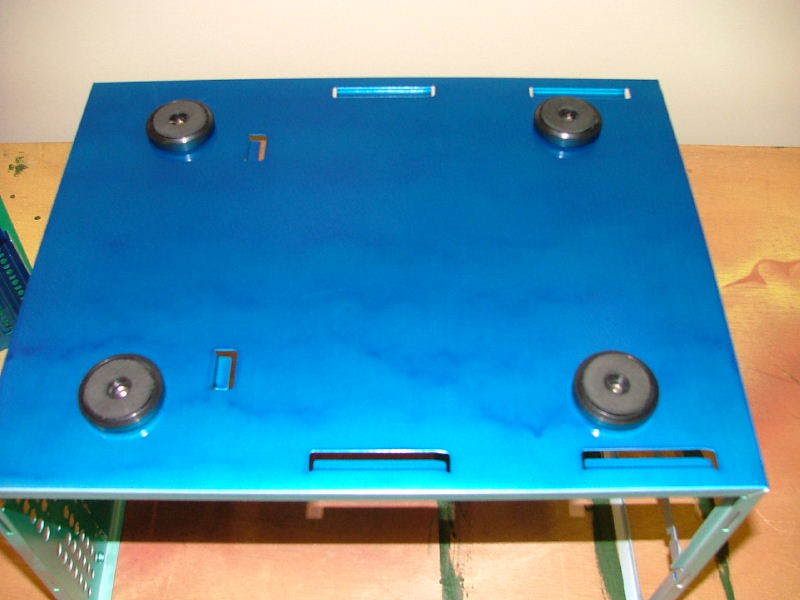
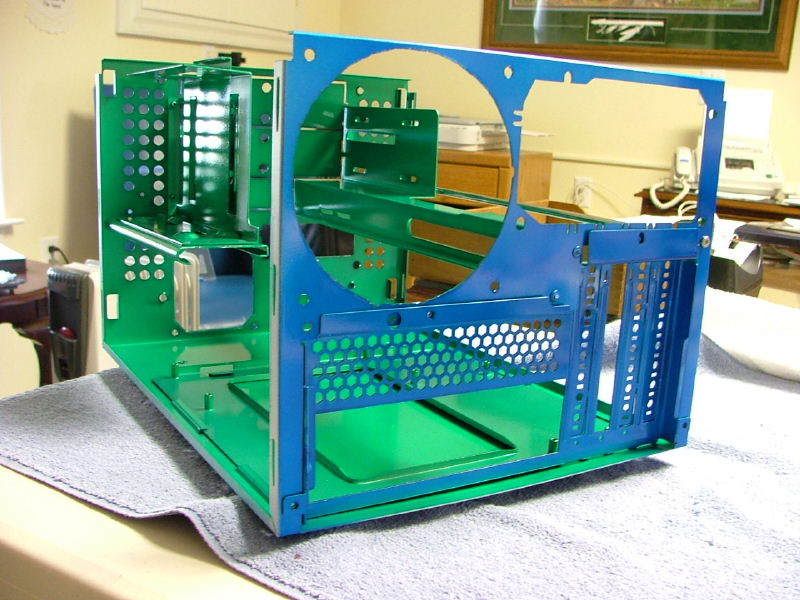
Now to get to the painting. At this time it was decided all bare metal external surfaces would be painted the âanodizedâ blue. So I masked off the mobo tray and did the rear of that and then the matching part of the chassis plus its âbottomâ. Then on to doing the green.
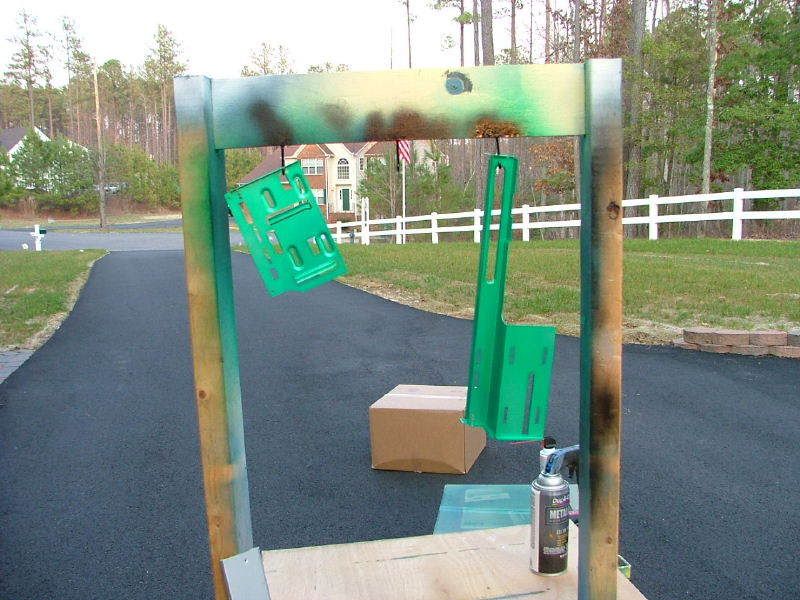
Now everything is hung out to dry overnight, this stuff on a good day is dry to the touch after about 30 minutes. However as you will see in the pic of the bottom, spray too thick and she will run, especially the âpigmentâ. The last picture shows the outside/inside appearance. However the chassis will be getting a second internal green coat Thursday because according to the instructions âif the next coat is not done within 30 minutes of the first allow to dry 24 hoursâ. Donât know for sure the why, but IT IS necessary.
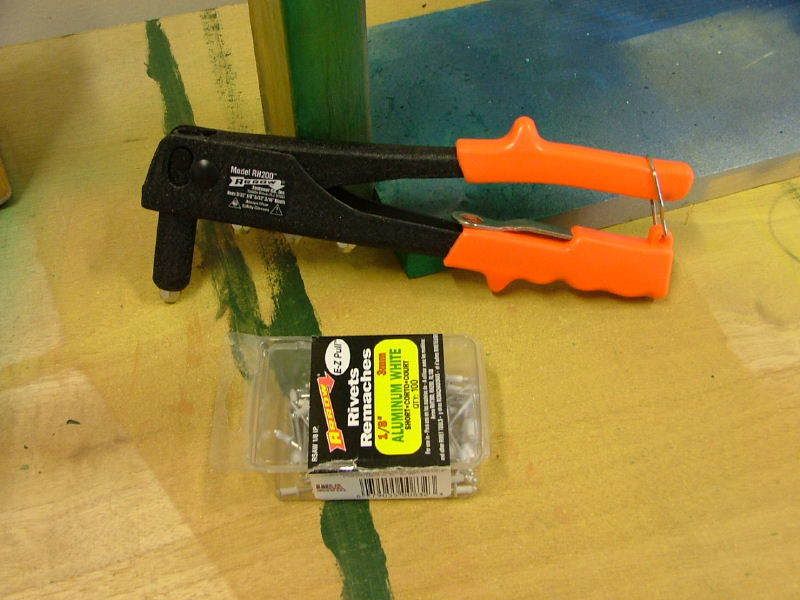
After I do that final interior green coat on the chassis, it will be time for me to find my âpopâ rivet gun.
03/15/07
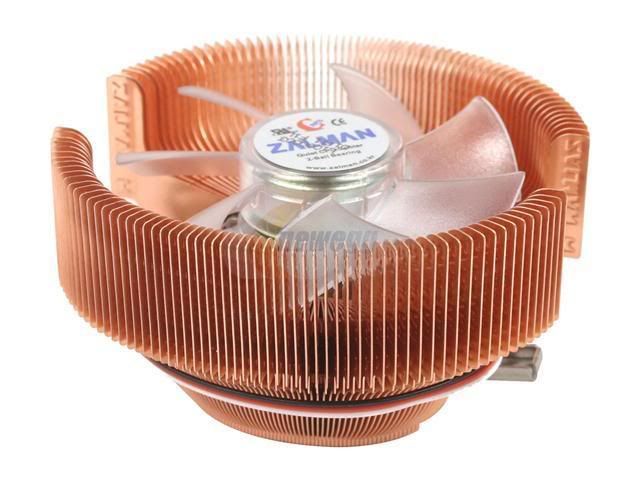
In the process of playing with the stuff yesterday, a realization settled in while I was at work. I asked and was told the zalman 9500 would fit in the case - which it does. However after receiving it..........yes it fits, but totally ends the idea of a removable mobo tray! It would seem that not only would I have to remove the GPU card (after taking out the PSU), but the HSF also before pulling out the mobo tray >> way too much work! So this leaves me looking at other possibilities for an HSF. I've just looked at the CNPS7000B-Cu and 7500-Cu, liking the 7500 (even though it weighs a ton). BUT it does not seem to be available here in the US!?!
03/15/07 Late AM
Got off from work this morning and decided to finish the painting before a scheduled TâStorm rolled in. In general rushed through everything (whatâs new) as I thought the storm was just around the corner. Also it is always a thrill trying to spray paint in between wind gusts.
Finished up doing the main chassis part and had newspaper down to avoid over spray build up. As it was with the wind it may not have been necessary. Also because of rushing I forgot to âprepâ the interior âbottomâ and the paint bubbled. Luckily that is located under the mobo tray.
Then got to thinking that I may be able to âpre-paintâ the rivets for the assembly. The jury is still out on that âinspirationâ. Stuck the rivets into a box for painting and let âer rip! The green did not want to stick, forcing me to do what I was supposed to and use the primer, after that all seemed to be okay.
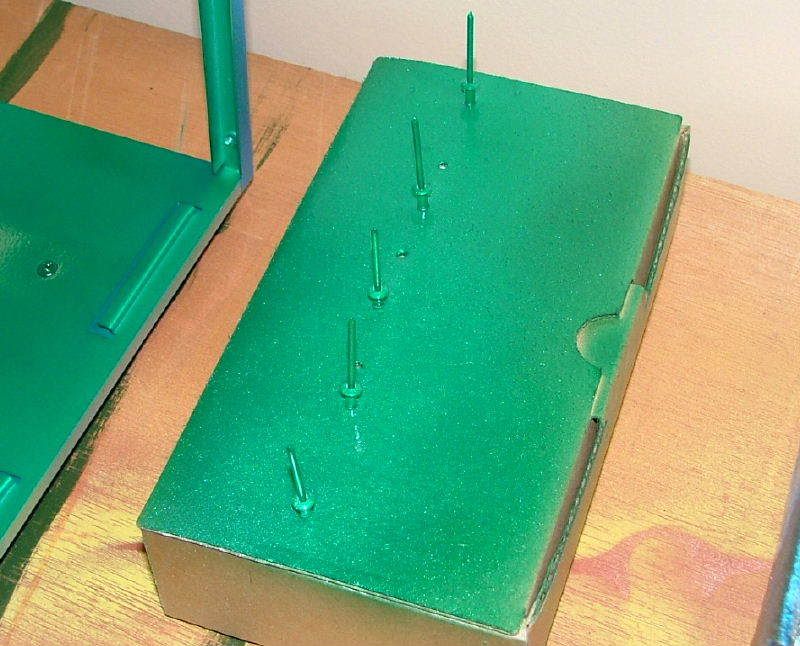
Something I did âbackfiredâ, had a little clear coat left so I sprayed the parts to add a little scratch protection. The anodized green apparently needed to dry longer because it ended up âscalingâ, but didnât peal. Just looks like s**t up close.
Well I found my rivet gun and put the pieces together. Didnât seem to be all that hard, but it took a little âpracticeâ to get it right.
Here we have chassis back together again, however I need to acquire an addition tie rod, as it seems the case is a wee bit warped. BTW I intentionally left the rod âchromeâ.
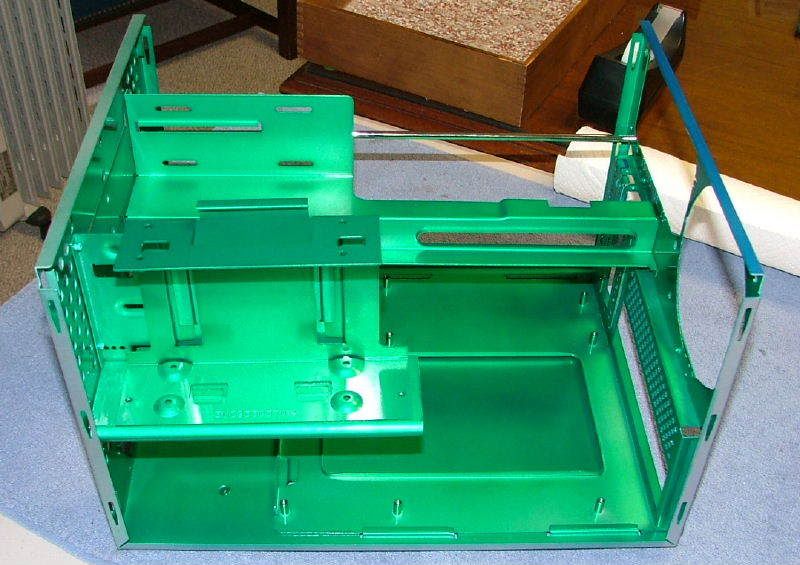 
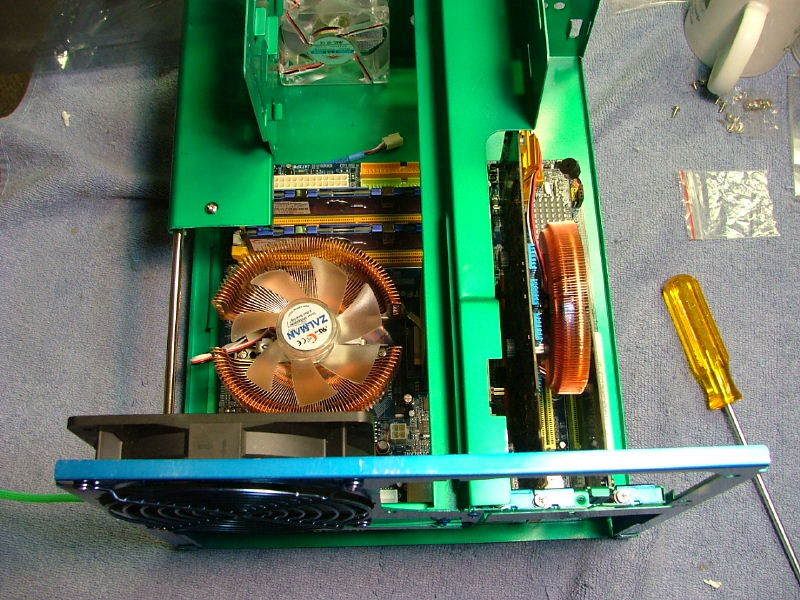
As I was this far and dog tired (yesterday starting late on the build I didnât get very much sleep before going into work) I decided to âdummyâ assemble the case. Then why not snag the mobo from another build and mount the GPU and throw it âinsideâ for a look see.
Time to crash and let this thing sit a while as I have to jump back on to BluHaz reDux and the Tech Station Mod
03/19/07
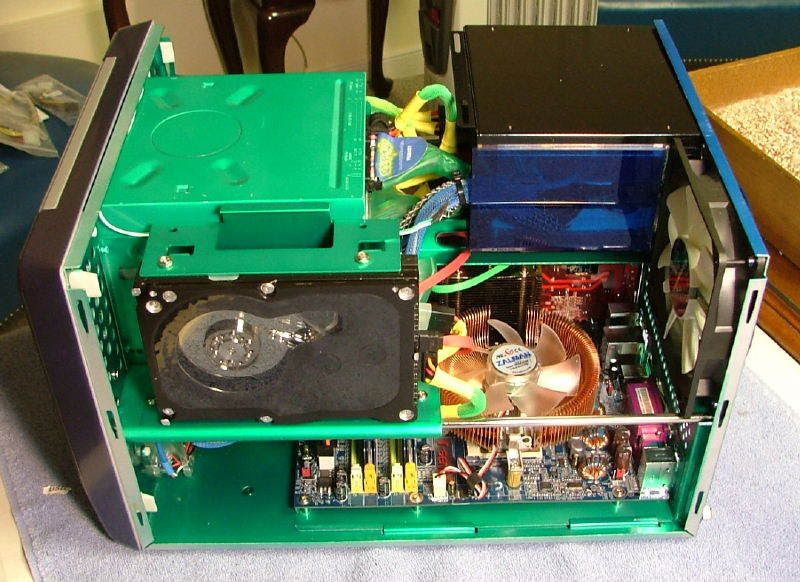
While waiting on parts for the Tech Station and BluHaz reDux, looked to see what I might be able to do here. Oh, yes mount the HDD, CD-R, and the FDD / Card reader!
The Raptors have a history of running warmer than the ârestâ so it gets the HDD cooler that had been part of the already mention upgrade that didnât happen. Here we have the Raptor & cooler and the MicroFly HDD tray.
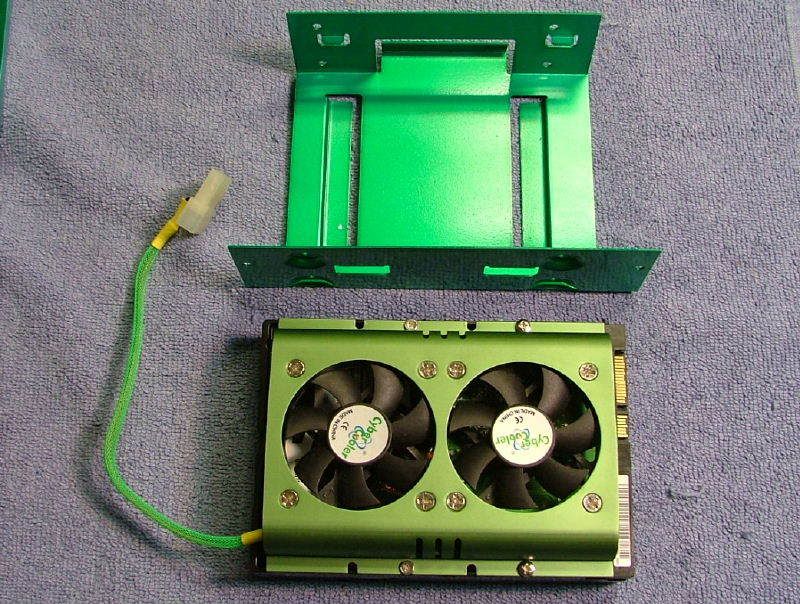
Having dealt with kind of thing before I knew I would have to bend the âguide tabsâ because of the extra thickness of the cooler, however ended up with one of the mounting screws hitting a tab. The dermal (and aluminum) made it âno big dealâ. I notched the tab and everything slid into place.
Still needing a âtie barâ because of shortening the HDD bracket brace, I took the one from the other side. You can see that in the shot of the HDD mounted before I replaced the side panel. Also it was nice that Ultra had allowed for 2 HDDs as it allows room for the fans on the cooler to actually be of use.
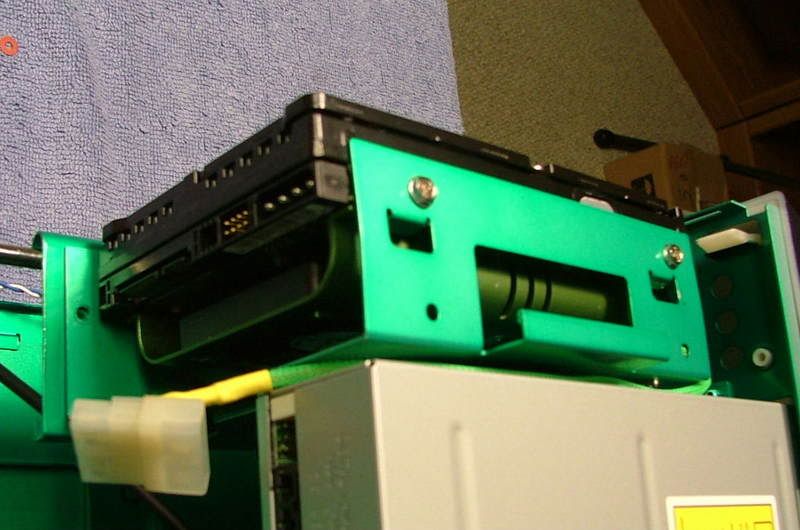
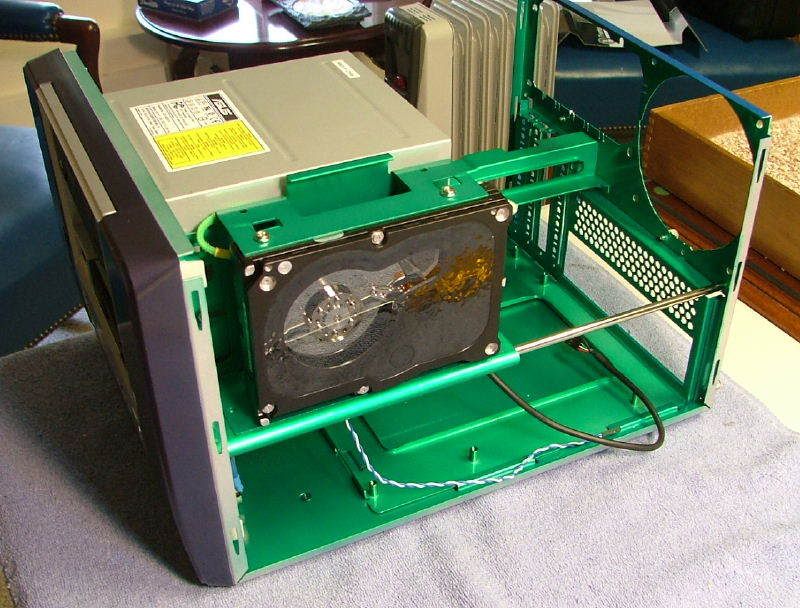
Reflections were killing the shots, but here is what Raptor X will look like through the window.
If there is one place where the âpuristsâ will say I whimped out it will be here
as I am not going to paint the drive faces like Iâve done in the past (DVD + RW on the way!). This is for two reasons, donât know what Ultraâs color is for the case, and didnât want to lose any of the text on the face of the card reader.
03/20/07
It seems that DreamCatcher has already received an upgrade, going from a 400W PSU to a 620W PSU! As the fates would have it CelticSpirit will require more oomph if it is to do 88XX SLI.
Soooo DC gets this:
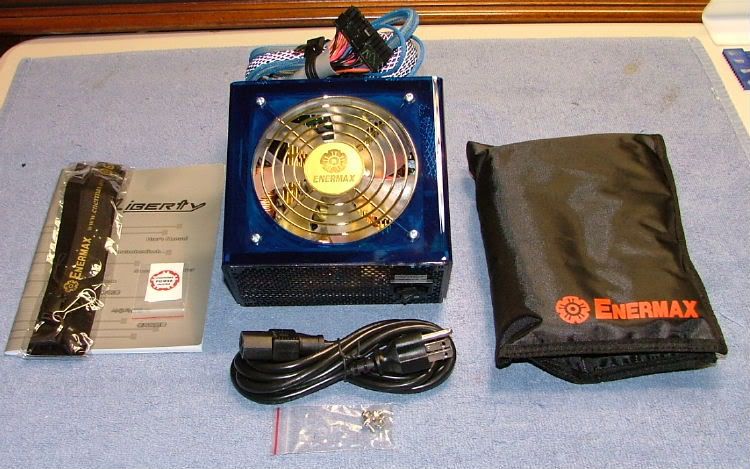 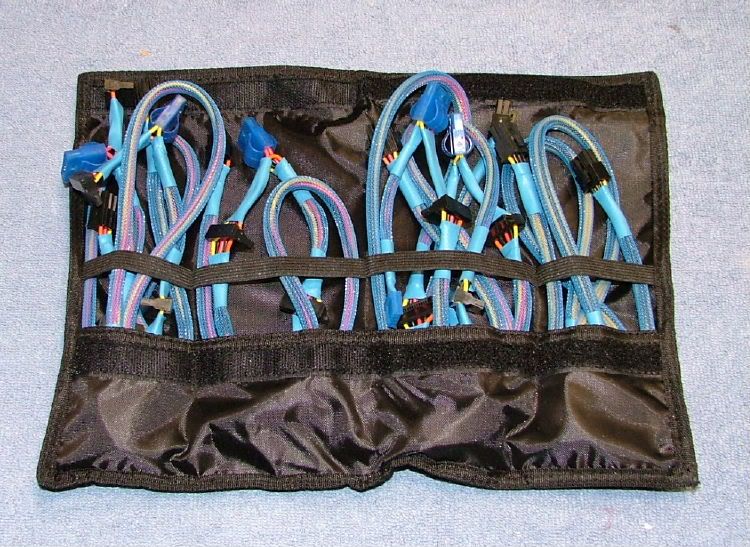
But currently debating the color of the sleeving for the cables and I might just use these in BluHaz reDux and have the ones I sent to performance-pcs.com done in the neon green with yellow heat shrink matching the wiring shown in an earlier post.
Also when does âit will fitâ not really mean it will fit? When you want to use you mobo tray with the HSF mounted! Here you can see what I was babbling about in the 03/15/07 entry.
03/21/07
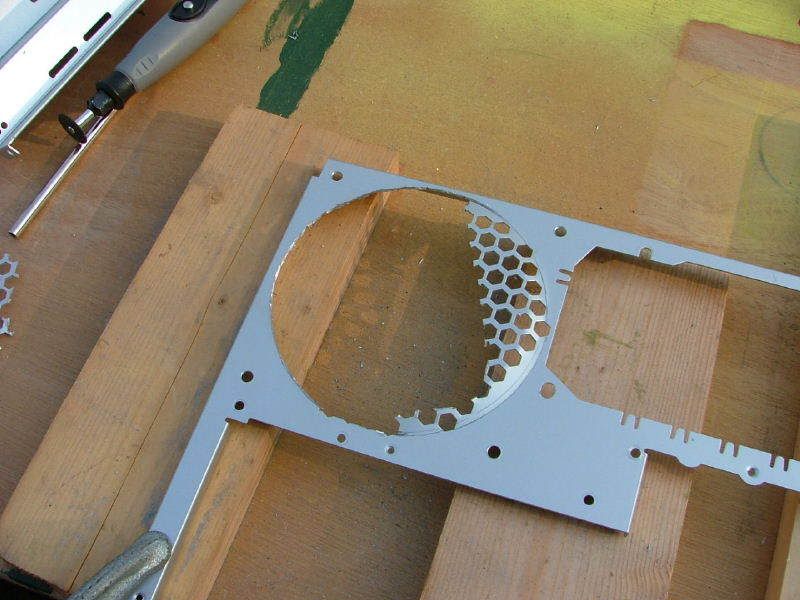
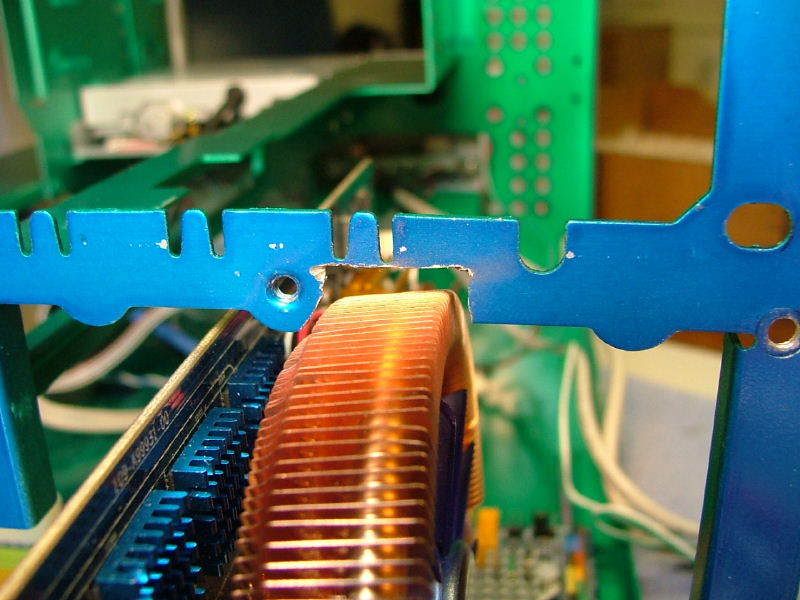
During the planning stage a concern had been if the GPU w/fan I had would fit. As mentioned before it was a yes & no >> it would fit but would have to be removed before pulling out the mobo tray. Of course requiring the PSU to be removed each time also. Then there was the realization that the Zalman CNPS9500 would have to be removed every time the mobo tray was removed. So it was decided to look into an idea I had earlier but dropped because of my concern on the rigidity of the aluminum case >> make a notch for the GPU cooler.
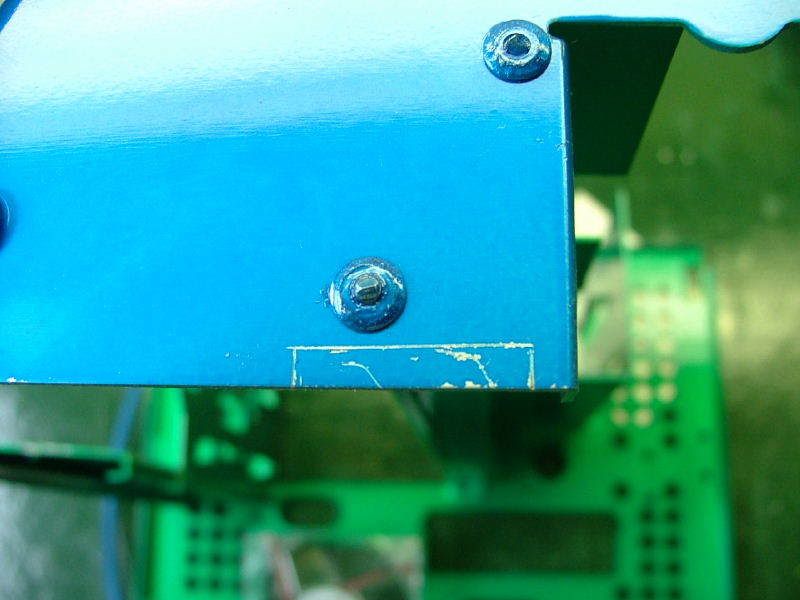
Now that Iâve worked with the MicroFly more, the less I worry about the âflimsinessâ of the aluminum. With the usual âmod on the flyâ the cross piece was rough cut with the dremel and will rely on the mobo tray to hide the shoddy workmanship! It is a wee bit âweakâ in that area after the cut, but will rely on the mobo tray (when screwed in place) and PSU to âstrengthenâ it.
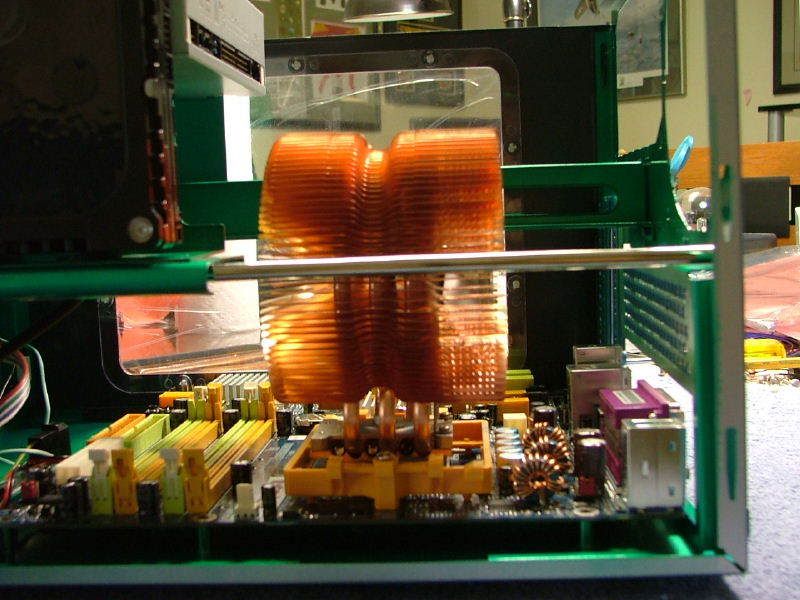
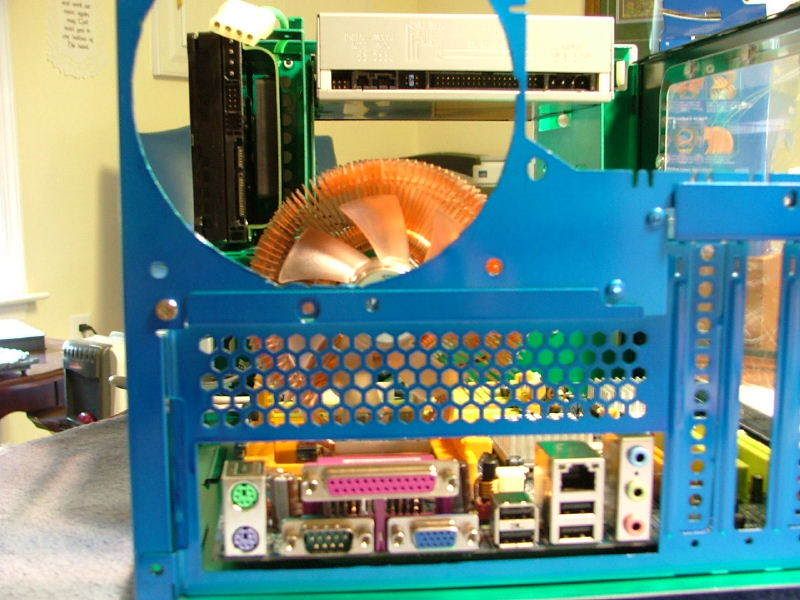
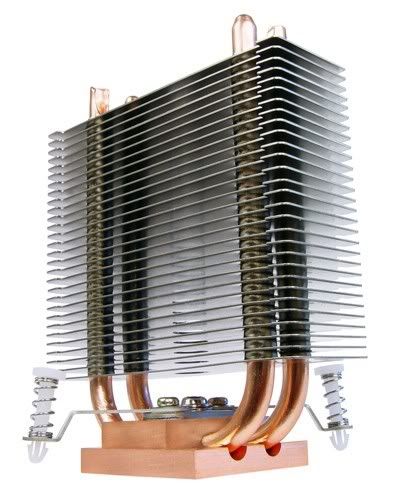
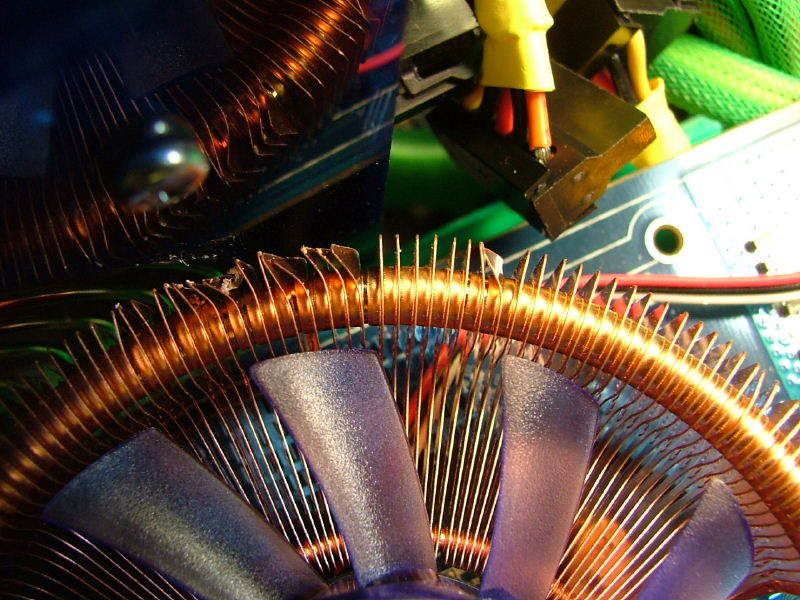
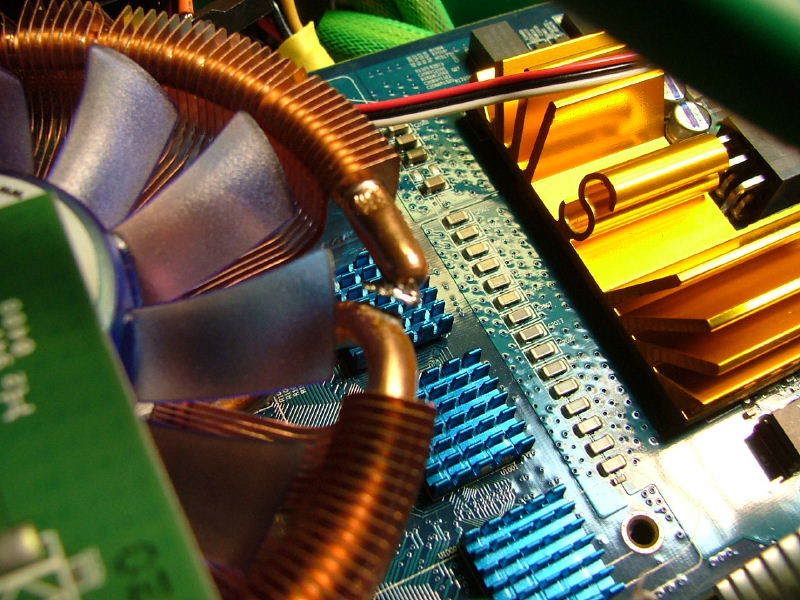
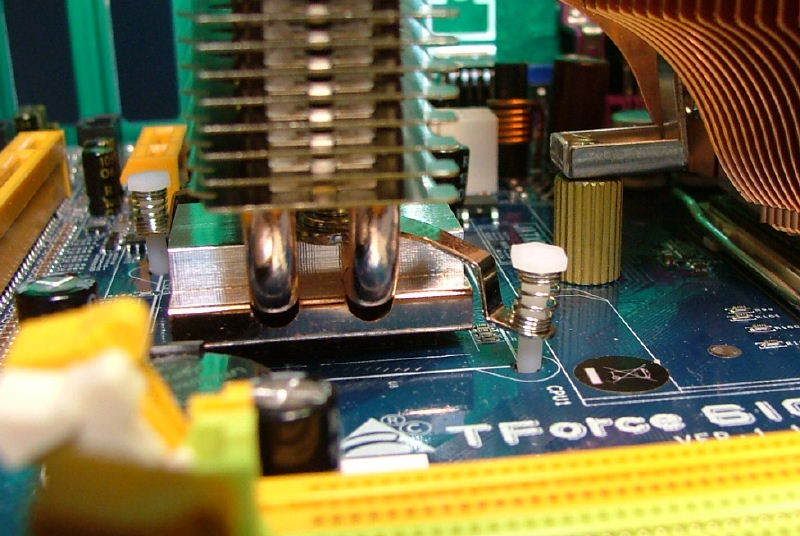
Now that I can remove the mobo tray without taking out the PSU, dropping the CNPS9500 was a no brainer (will have to find it another home) and use what came in today, a Zalman CNPS7000B-Cu.
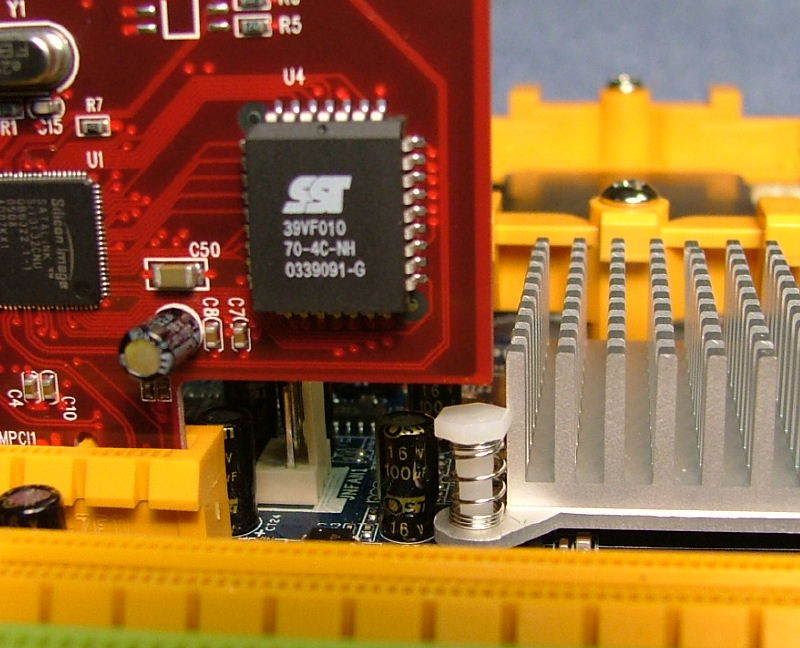
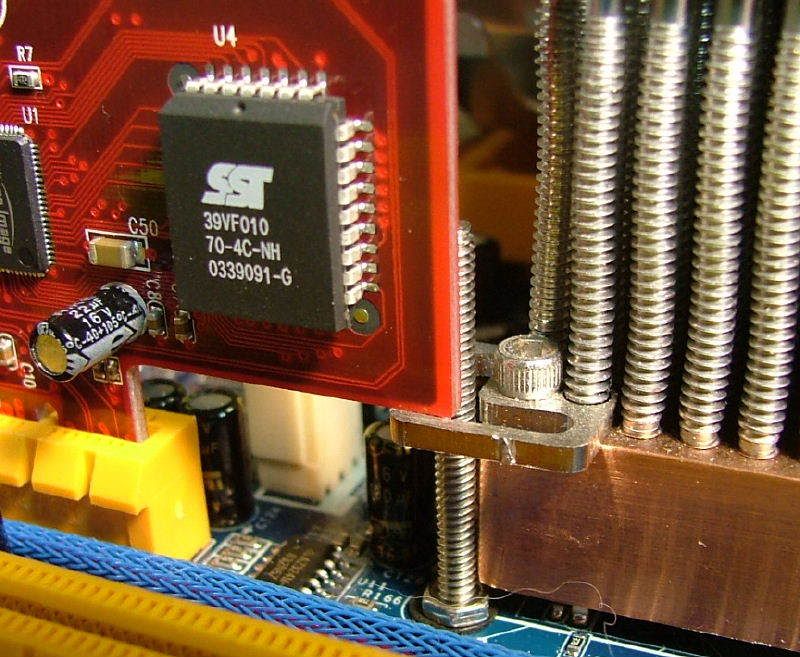
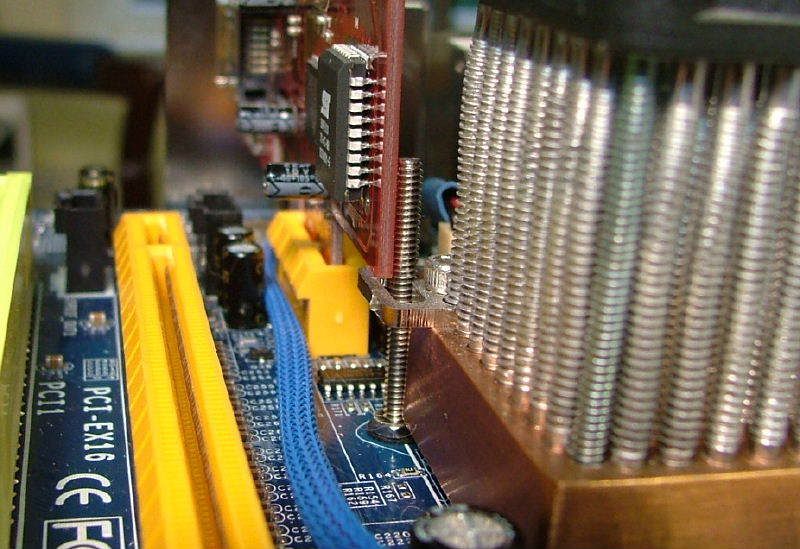
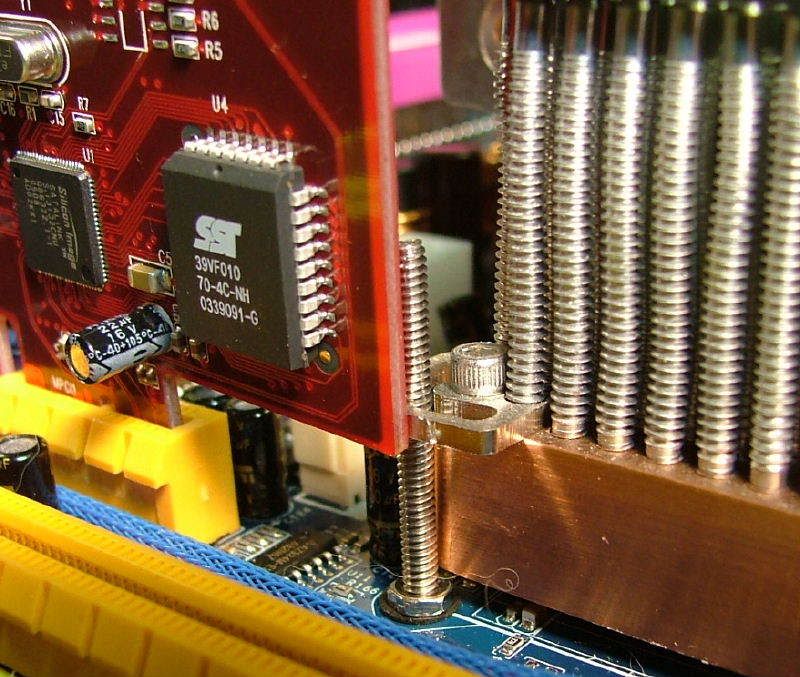
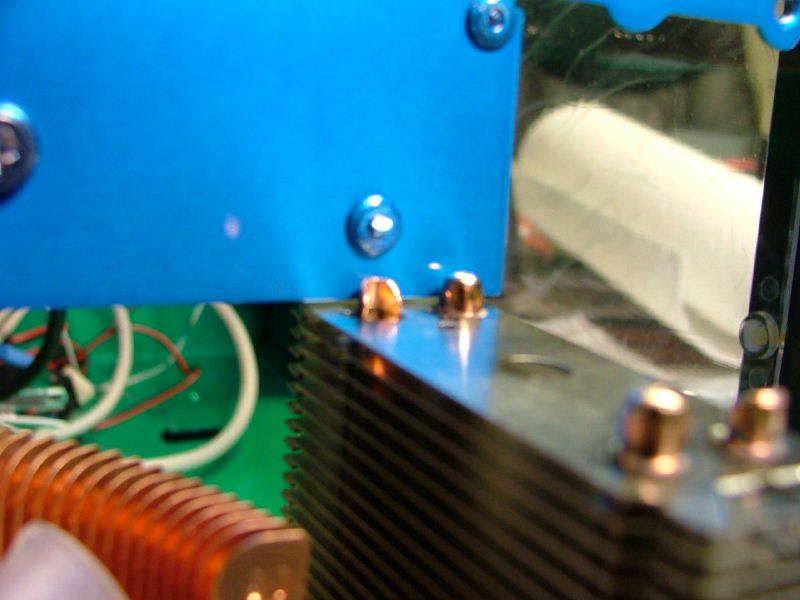
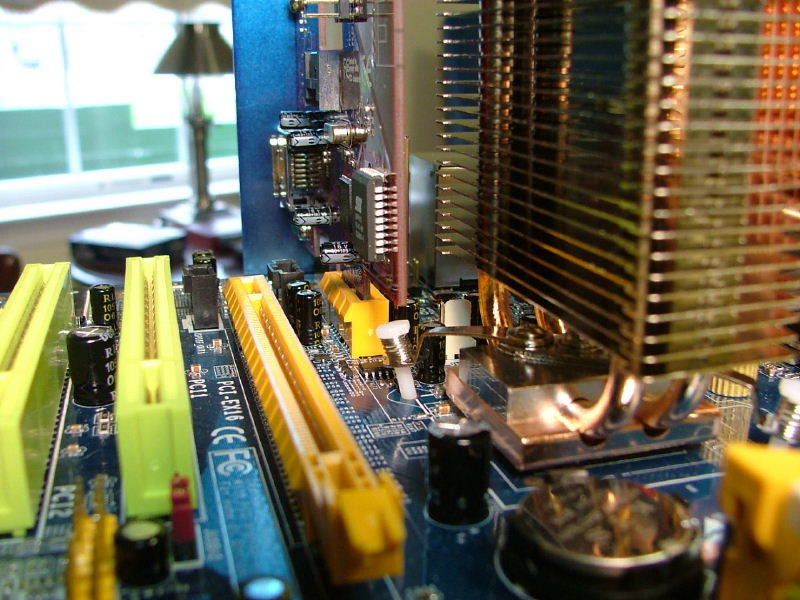
Unfortunately while fixing one fitting problem I encounter another. Biostar, unlike most, place the one pci-e slot above the GPU slot. This keeps it from getting buried by a 2 slot solution GPU that is cool! Since the mobo only has two SATA headers and I went e- SATA for my external enclosure, I purchased an e-SATA pci-e card. I had realized the NB was close so I chose a SABRENT SATA-PE2P PCI Express SATA II Controller Card as it is a very short card. Not short enough it seems!
Here are a couple of pics showing the fit with the stock NB cooler. I have approximately 5/8â from the mobo pcb to the bottom of the card.
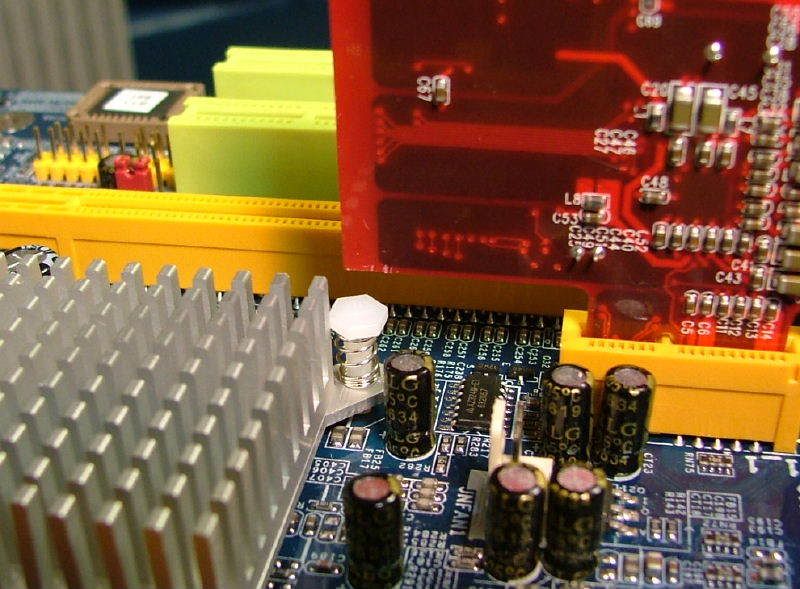  
As I have planned on using a Swiftech 159A NB cooler alarm bells started going off. So I grabbed BluHaz reDuxâs 6100-939 with one already installed and sure enough it is âAhhhh s**t!â
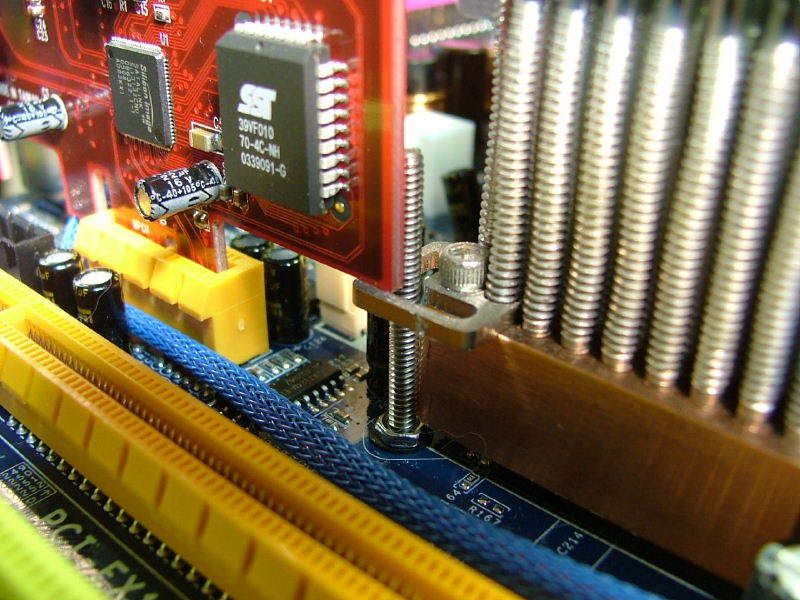  
The 159A had to be âtwistedâ (hope I didnât bork my thermal paste!) just to allow the card to seat.
Now Iâm scrambling for a nice after market whose base and mounting hardware can fit under the card (or I can scratch the card and hope newegg wonât hit me too hard for restocking!). Initial checking has me interested in the following:
1. Thermaltake CL-C0034
2. Jing Ting Chipforce JTS-0006
3. ANTAZONE AS-N2000 (newegg.com)
4. Thermalright HO-05 standard & SLI versions
Of the four the AS-N2000 (have to go to their site) seems to âfitâ the best. From what I can tell the mounting legs go on the bottom and mount almost flush with the PCB.
03/24/07
Thought the HR-05 standard would work as it seems to the only one that can be positioned to miss everything and have the pushpin fit under the card so ordered it last night. Felt pleased with myself in what seemed the âSolutionâ, until I walked past the case!
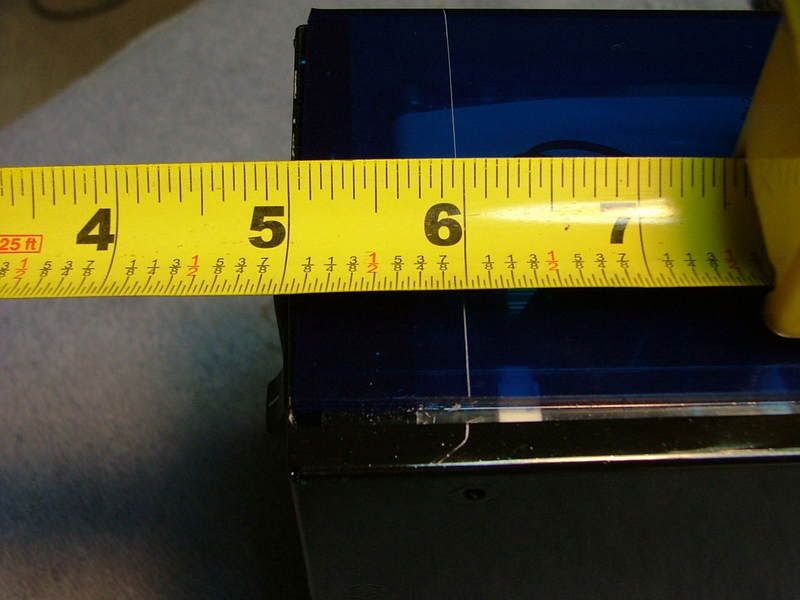
It seems that for the third time I âneglectedâ a dimension. The HR-05 is (fin area )77.9mm W x 19mm D and (base) 30mm Square x 105mm H. 105mm = 3.465â (3-1/2â) and the ruler in the pictures saysâ¦â¦..

Add to the equation the vertical opening in the chassis for the mobo tray is approximately 3-1/4â where the NB chip is located, letâs see hasnât this happened before?
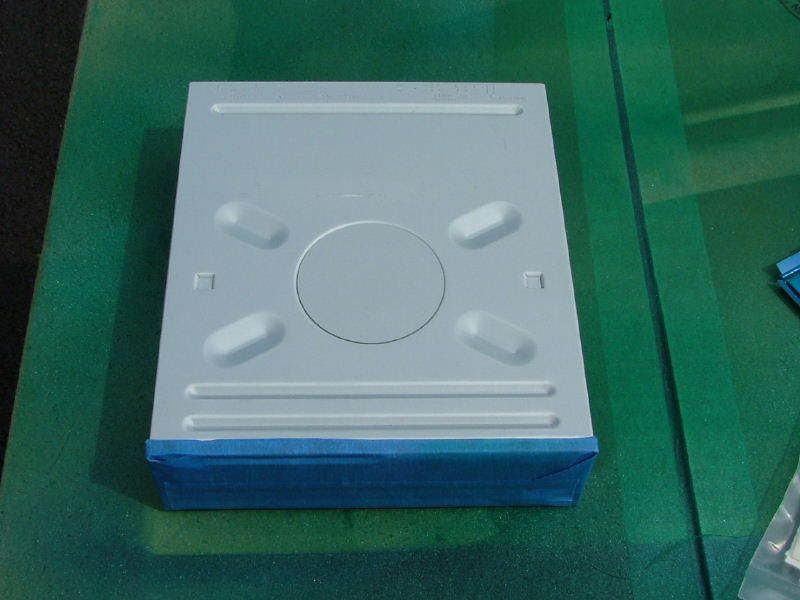
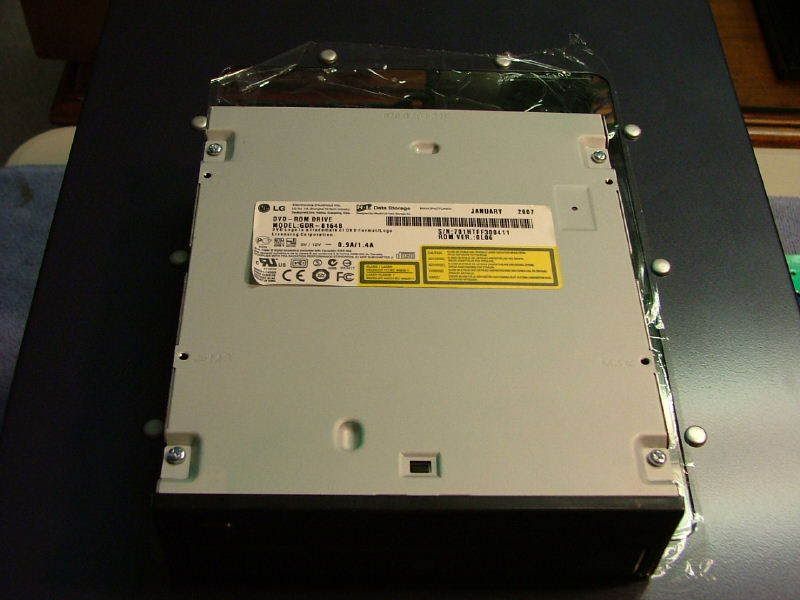
The CD/DVD-ROM came in, so in the box it went. Ah wait a minute, what is that ugly silver surface with a white/yellow/black sticker in the top window?

That isnât going to fly!! Letâs see sticker is now on the bottom (shouldnât be where it goes?), masked off, and going to get some paint!
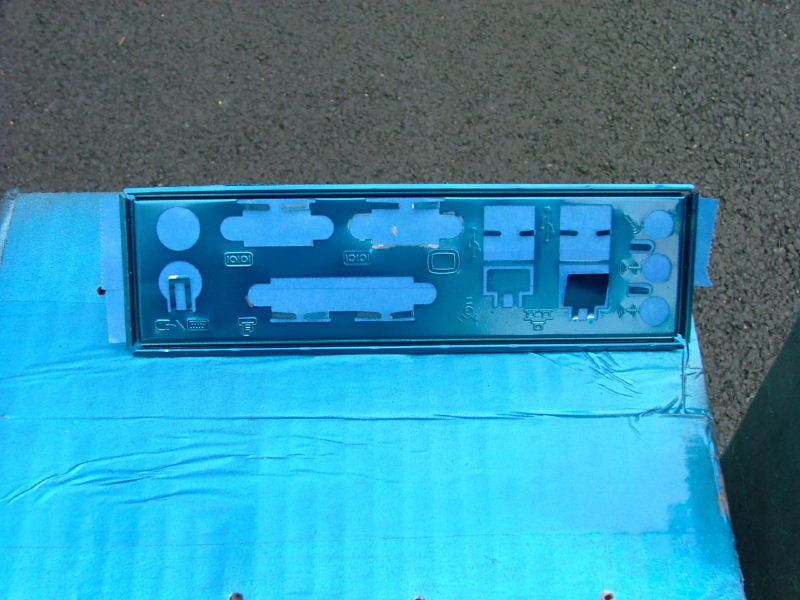
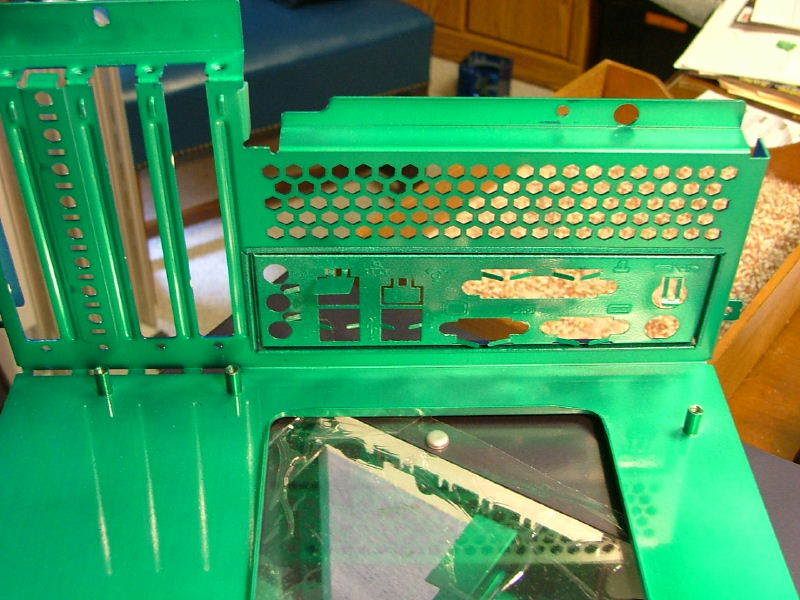
While Iâm at it need to correct a color scheme issue, it seems I painted both sides of the I/O plate blue (as in BluHaz reDuxâs) which wonât do with the green interior. Repaint time >> here we have it masked off (to protect the blue side), then primed to lighten up the base for the green.
And while Iâm at it why not paint a couple of tie downs for when I tidy up the cables at final assembly (primed so to take the green)
Now everything is green and drying. Now in place and looking âbetterâ
Now I have to wait for the NB cooler to come in and see if it gets added to a growing âFor Saleâ list. Also the sleeved PSU cables wonât be in âtil the end of the week, so this will sit as I try to get some work (waiting on components for them too) on the Tech Station and BluHaz reDux. Also need to get my office/work area straightened up as Iâm âloosingâ stuff!
03/26/07
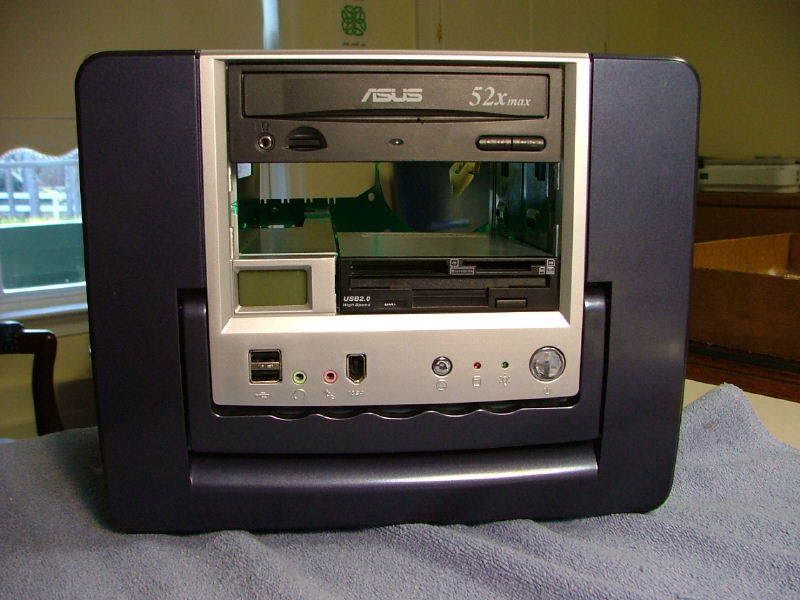
Probably failed to mention that the Asus CD-ROM has been replaced with a LG GDR-8164BK, CD/DVD-ROM (16x52x). Came across a shot of the Asus and decided to show you why. See how much more room the LG gives between it and the PSU. Big improvement!
ASUS:
LG:
 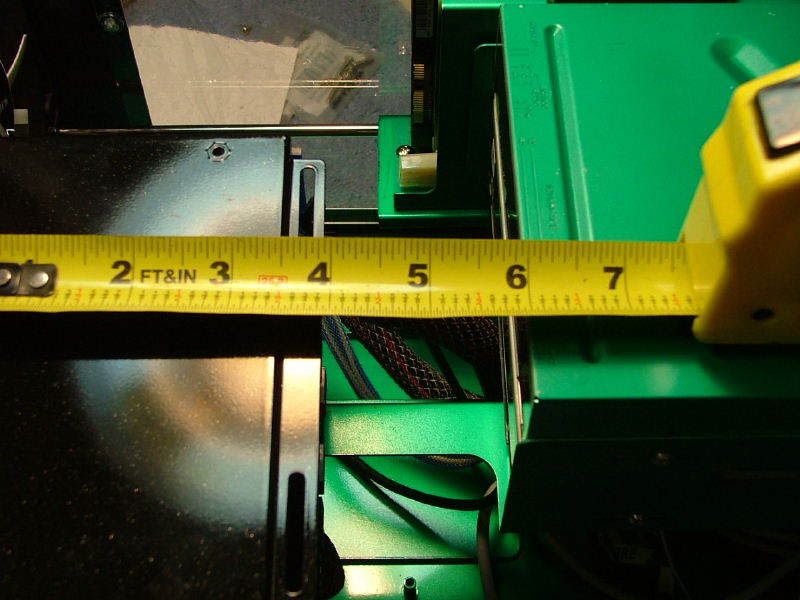
While setting up the above pictures another âmATX Cases leave little room for errorâ thing showed up. Originally I used a stock Liberty (400W) for layout and spacing issues, however when I decided to go with the âcustomizedâ 620W I forgot (again > old age is a b***h) the acrylic cover adds 3/32â â 1/8â to the top and both sides! Soâ¦â¦â¦
1. The space between the PSU and the 120mm fan is gone and now a major point of contact, as can be seen here (excuse the fuzzy one âmicroâ was off). Even butting up against each other the mounting holes in the PSU do not even come close to the clearance holes in the chassis.
It seems I will have to remove 1â of the acrylic as Iâd rather do that than cut into both fan flanges. It is hoped that will also take care of any interference on the opposite side with the frame. Of course sadly the PSU sits higher so I may have to slot the mounting clearance holes in the chassis!
Also as the cover is double sided on, it will have to be cut "in place". Glad it will be poly shavings blowing in there and hope the shop vac can get some of it!
03/29/07
As I feared in the game of fractions of an inch (or mm) with this case, the HR-05 NB cooler is too tall and would require me to remove the lower part of the PSU support . So now I have one of these on order, a Noctua NC-U6â¦â¦
When it gets here need to see if a fan can be attached to it like the HR-05. If not maybe the CNPS7000âs fan will do the trick. However as I write this, I wonder how close the fins, 70mm (2-3/4â) W x 23.5mm (15/16â) D, will come to the components at the end of the SATA pci-e card?!? Will have to see when it gets here.
Also took the opportunity to work on the PSUâs acrylic cover. Again one of my major concerns is the âtrashâ from cutting the cover going into the PSU. However, at least I am cutting plastic and not metal so my primary concern would be for aesthetics and not wanting any smell from âburningâ plastic on hot components. So the shop vac was positioned to try and get most of the âfilingsâ from the cut.
 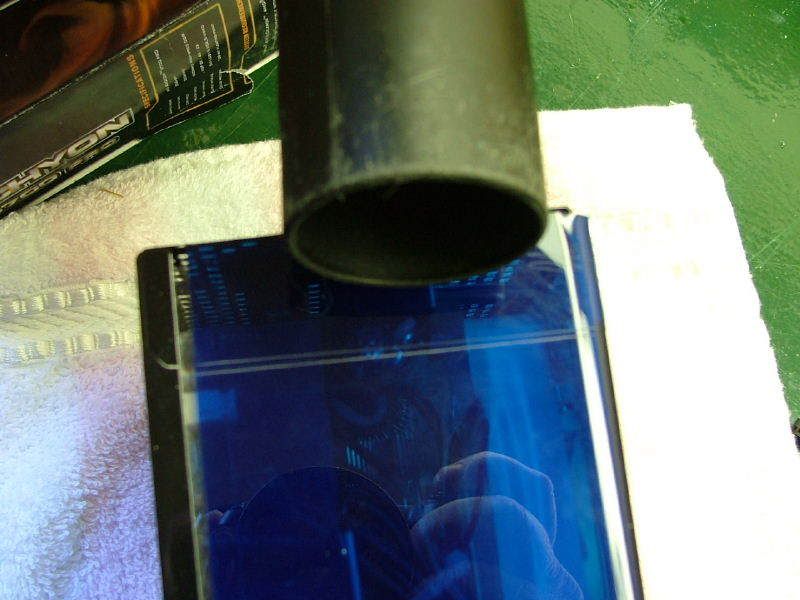
As it turned out I had to reposition the nozzle so as to be cutting towards it for best pickup. And here we have the rough cut that I will test fit before cleaning up.

As one can see there is a gap, believe it or not that was on purpose. First off I didnât want to have to try and do a second cut that would be more grinding than cutting. Secondly and , to me anyway, just as important didnât want any contact with the fan that could amplify any vibration.
 
If you look closely at the center of the second pic, you should be able to see one of the reasons for cutting the cover and not the fan. The cut would have more than likely broken through the shroud. Besides I didnât feel like hacking on a $20+ fan!!
With that, I should be ready to do the final assembly when the following items arrive:
1. NB Cooler
2. Another chassis tie-rod on the PSU side of the case
3. Sleeved PSU cables.
03/31/07
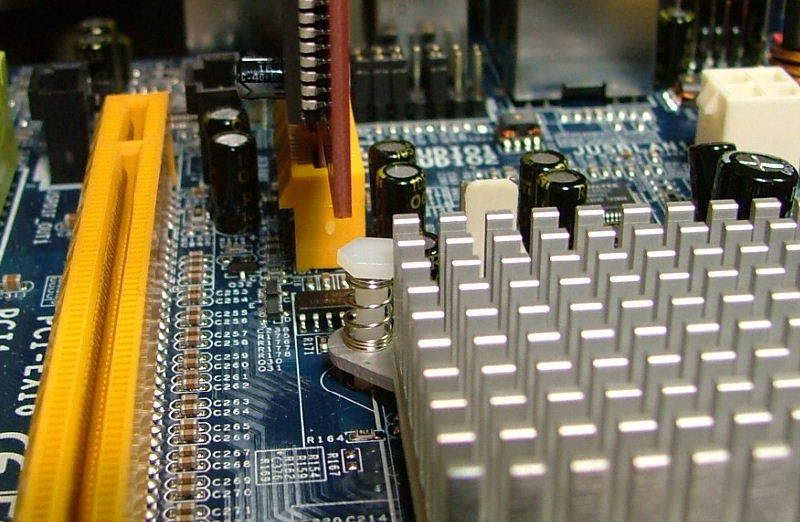
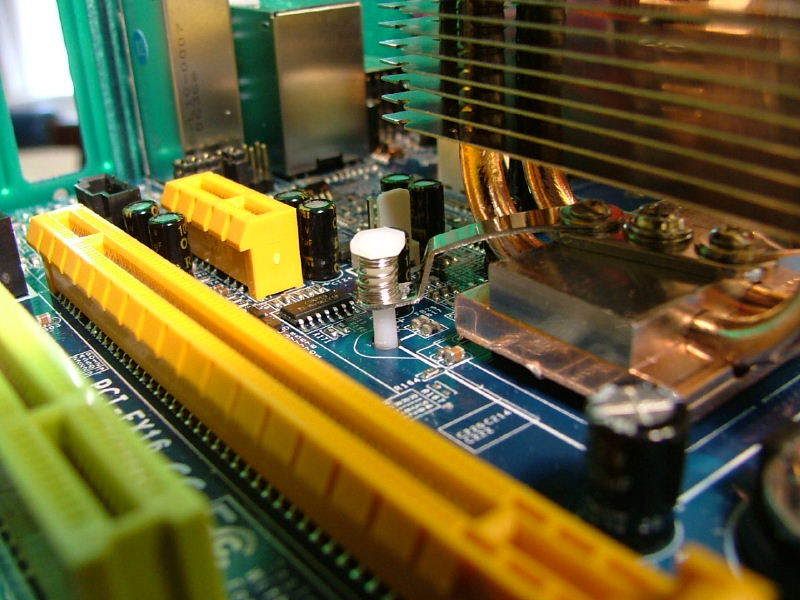
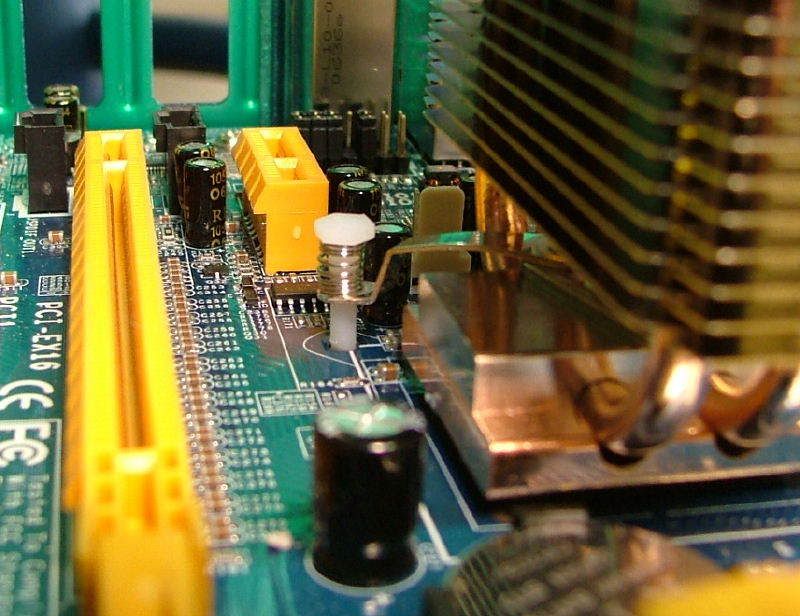
The Noctua NC-U6 arrived from jab-tech today (quickly I might add) and now it is time to see if indeed the third time is âa charmâ. Didnât do anything fancy, just sat the NB cooler âin placeâ to roughly check the fit. While fuzzy (micro setting turned off again!) you can see in the next two pics the mATX case fates did not smile on me height wise!
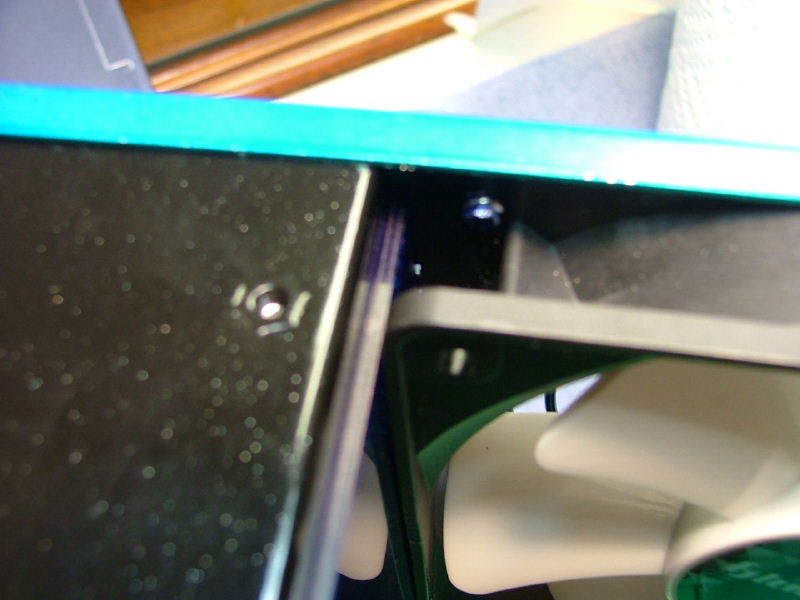
Since the ârough fitâ seem to indicate the mounting hardware would fit under the pci-e card, decided it was dremel time. First you have the cutout marked, then cut, and finally filed. Interestingly enough the bottom of the HDD brace was only a couple strokes of the file in the way. The fourth shot is from the interior showing this.
And here is what all of this did for me!

Now addressing the original problem of the SATA pci-e card hitting the mounting hardware. The NC-U6âs pin mount does indeed fit under the end of the card as you can see in the following pictures. However you will also notice that the mounting pins do not go vertically into the holes but at an angle. Iâm somewhat at a loss for this as I could not determine if there are any adjustments I could make. The pins appear anchored and the unit sits as opposed to hangs so I should be fine.
So now it appears the only physical items Iâm missing is the side support rod.. Performance-pcs has sent the sleeved items and the only thing else I can think of is if I want to figure out how to hang a 60 x 15 fan on the NB cooler!
04/01/07
Started to put everything together so I can fire this thing up.
The first thing that came up, was the fact my FDD cable was too short (coolmax Scorpio green) and had to scrounge another one up. Found an 18â plain green vinyl one in the scrap box. Then I got reminded Iâm dealing with aluminum â it flexes like thereâs no tomorrow! Didnât take any pics but with the PSU in place there was enough flex in the chassis that when I pulled the mobo tray out and put it back in I snagged the NB cooler and the Zalman on the GPU, big time! Hope the NB didnât break the thermal paste enough to require remounting. Didnât realize how badly I had snagged the Zalman (fins getting caught in the fan grill) until later in the install. Iâve bent fins and broken a weld, and hoping again that nothing was âsignificantlyâ damaged. Will find that out when I start it up!
I ended up using a hacksaw and file to widen the slot for the NC-U6 (there was enough flex that the fins were catching on the frame) and widened as best I can the cutout for the GPU fan.
Also spent way too much time trying to âtidyâ up the cables, as I havenât even seen if the thing will fire up! Need some shut eye and will get back to this today (03:40 now) in between the honey dos.
04/01/07 Later In the Day
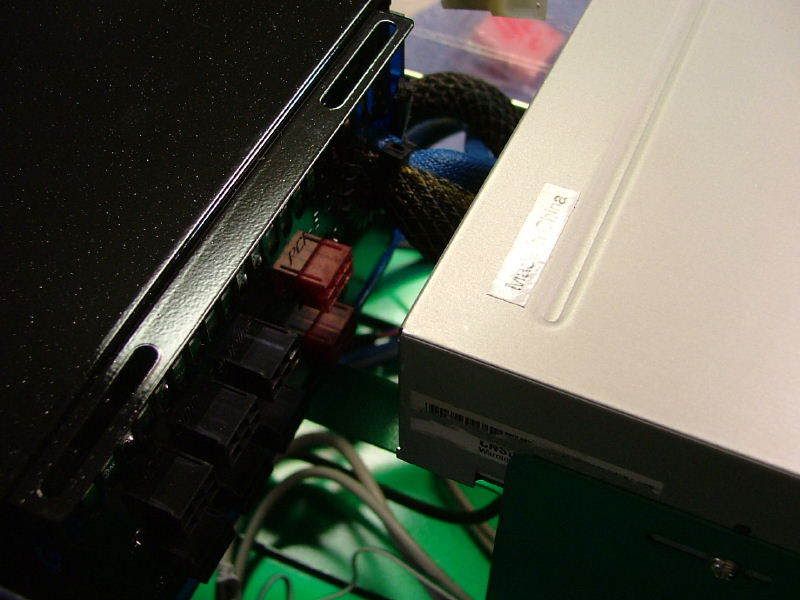
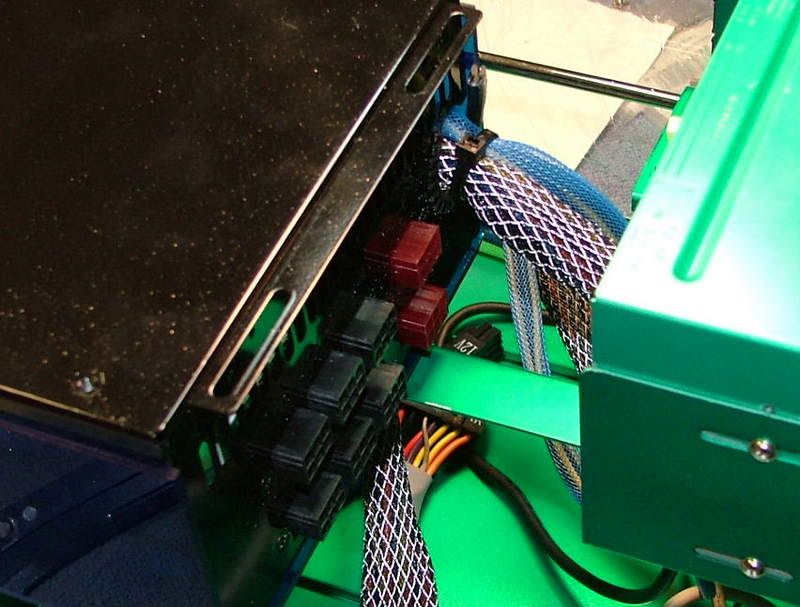
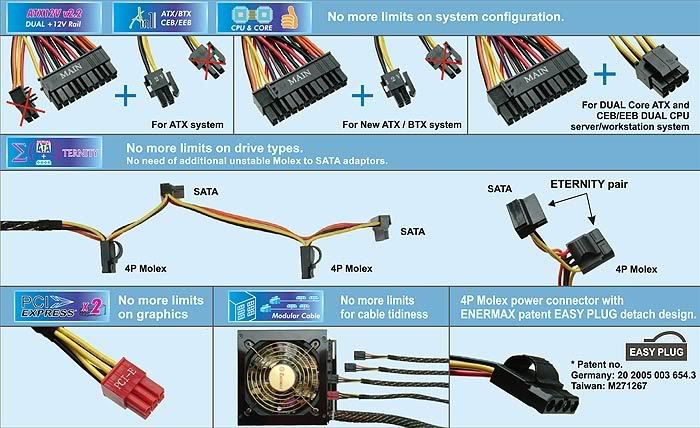
After getting some shuteye and a few honey dos under the belt took a look at what I done in the wee hours. Making the cabling neat in this thing is going to be a challenge that to some I may not be able to accomplish. Enermax traditionally has very long cables and the Liberty 620W is no exception. The 24-pin mobo connector cable just will not fold up neatly and the 12V and fan 3 pin connector cables are 4 x longer than needed ( usually 2 x in a âstandardâ case!). The modular power cables present another issue. Besides the length Enermax has what they call an âeternity pairâ which consists of a SATA connector matched with a standard 4-pin molex. In theory this is cool because of not knowing what the cable will be powering. However in actual use (in this case anyway) the connectors are too close together. Each cable has 2 of these pairs and when I was hooking up the two optical the SATA connectors definitely got in the way! On the plus side however Iâm very glad that I didnât have all of the cables âhard wiredâ!
Anyway here are some pics of what the first attempt to assemble the thing looks like. I have to use caution in several places because if Iâm not careful excess side loads can occur on the connections because of âcrammingâ the cables into place.
Of course this all can become immaterial because if I do as someone at another site recommended it has to be taken apart so I can reset the NB cooler and possibly the GPU cooler because of the prior mentioned issues!
04/03 - 04/05/07
2nd Assembly
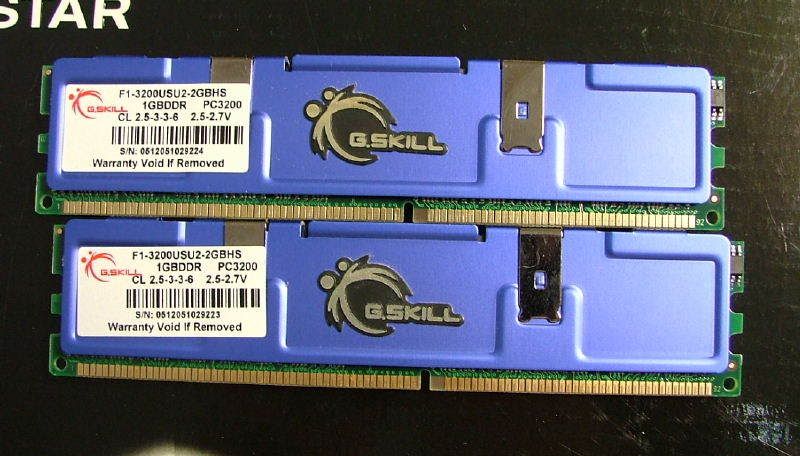
Due to the issues of having to reseat the NB cooler, and some apparent flexing of the chassis, I basically took the mobo portion of DreamCatcher apart. So now we are being what I refer to as the 2nd Assembly. This consisted of the reworking the NB, and cable routing and general tidying up of the case interior. Also at this time the memory was changed, the g. skill F1-3200PHU2-2GBZX has been replaced with g. skill F1-3200USU2-2GBHS.
NB Cooler
After I removed the NC-U6 one of the things I wanted to look at closer was why the mounting pins had not gone in straight. With the help of âEngineering by Klinesâ the mounting arms were reshaped to give them more of a âdrop downâ shape with hopes of eliminating the weird cant of the mounting pins. Also readjusted the angle the mounting legs have away from the main body of the cooler. As you can see it appears I accomplished most of my goal.
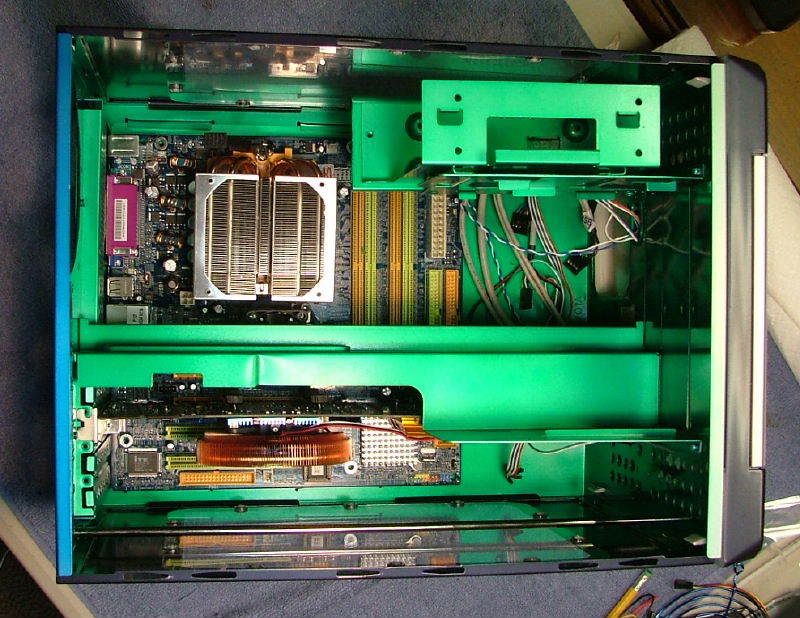
Interior Layout
When I put everything back together, needless to say cables ended up not going back the way they did during the first assembly. Of major note on the left hand side (GPU) the power cables were pulled out from behind the GPU as they were pushing against the top corner bending it outward. I decided to bundle them along side the drive bays and they donât look too bad. Also the FDD cable was slightly rerouted as I now have the tie bar in place and was able to wire-tie the cable to the bar. Then on the right hand side and in the middle of the mobo several things were changed. The +12V mobo cable was moved to the opposite side of the HSF as well as the power cable for the rear fan. Also I had found a shorter 4 to 3 pin adapter that allowed for less cable.
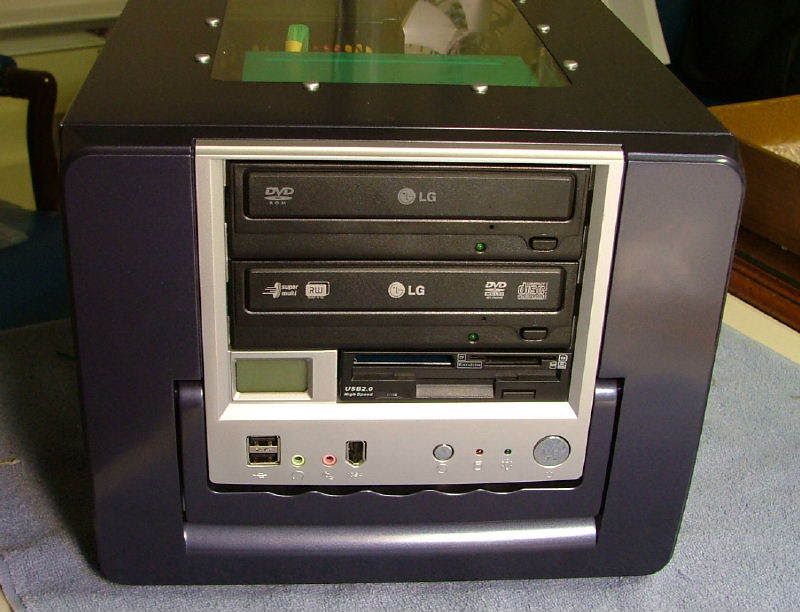
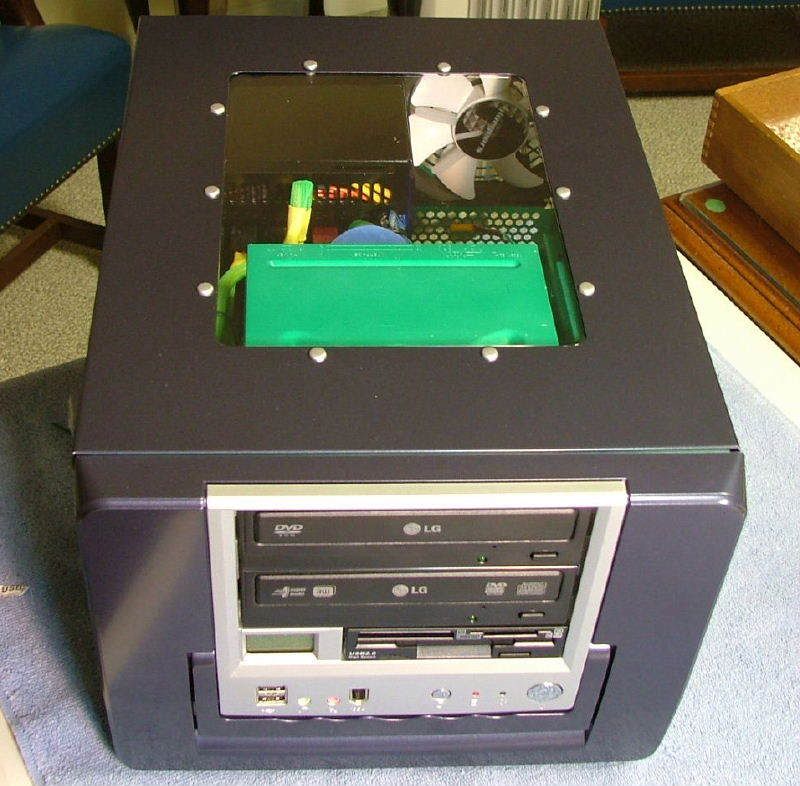
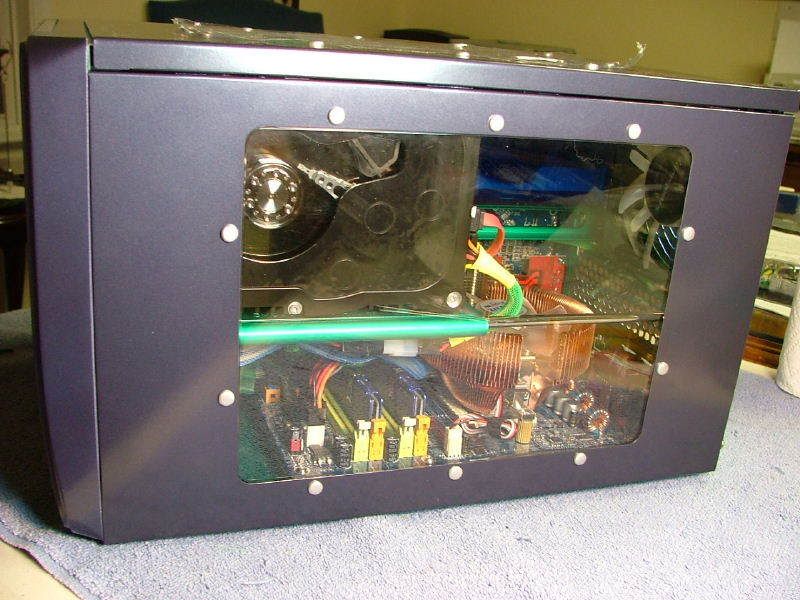
Exterior
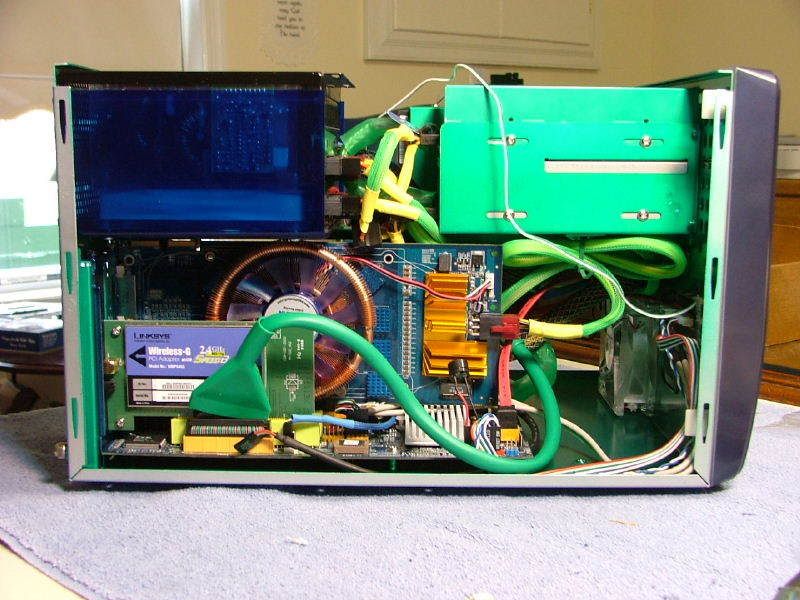
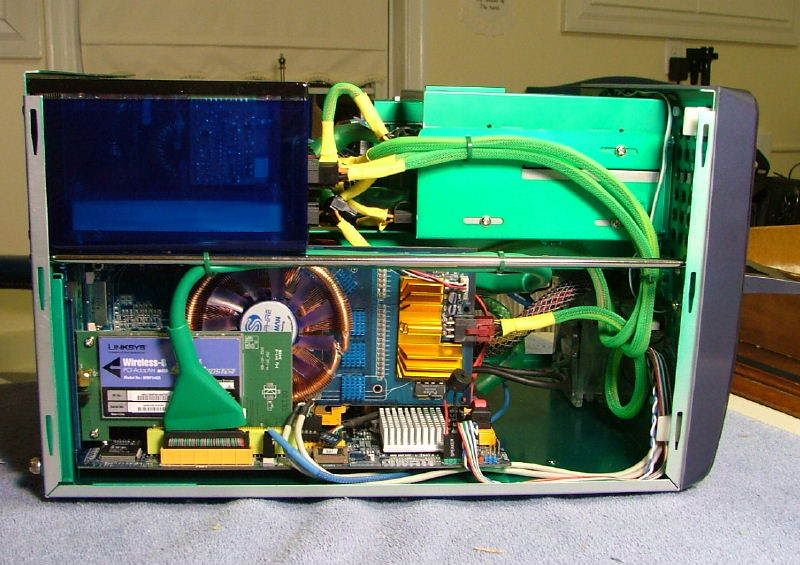
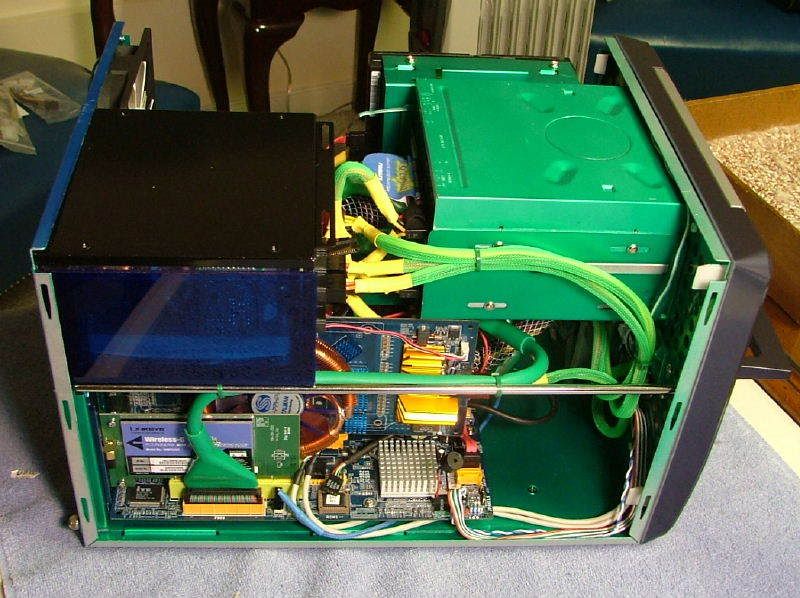
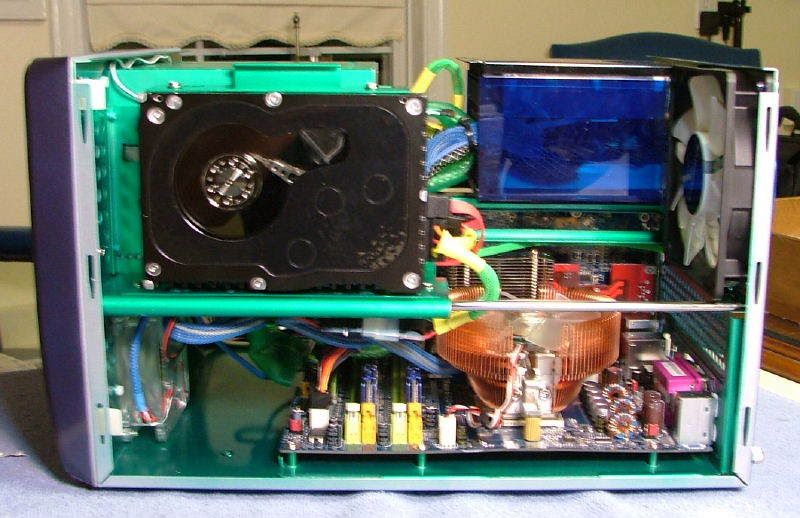
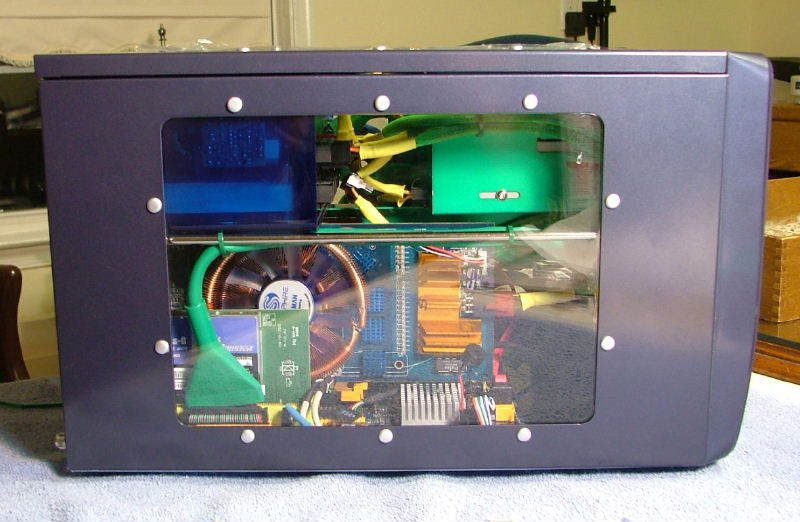
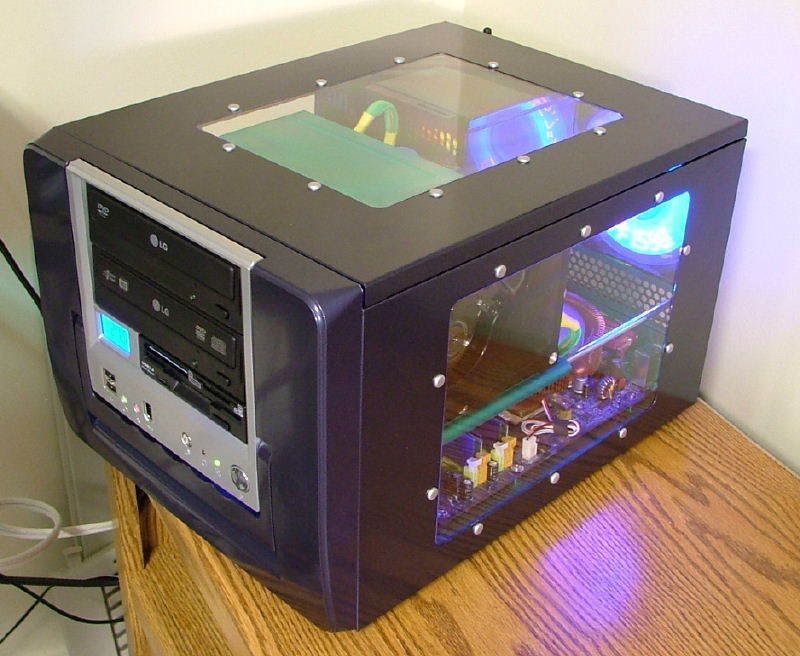
It was then decided to âbutton it upâ in order to see what it would look like through the windows. So what we have here is a kind of 360 scan of DreamCatcher on the outside. Please excuse the reflections on the windows.
In the next couple of days the power will be turned on, OS + other software loaded, and testing will be done. Will get to yâall on what happens then.
Last edited by jedihobbit on Sun, 06 Apr 2008 11:14:38; edited 3 times in total |
|
| Back to top |
|
 |
jedihobbit
Rated XXX
Joined: 22 Mar 2007
Posts: 238
Location: Central Virginia, USA
|
| Posted: Fri, 04 Apr 2008 02:08:09 Post Subject: |
|
|
04/05/07 Late PM
ITâS ALIVE!!!
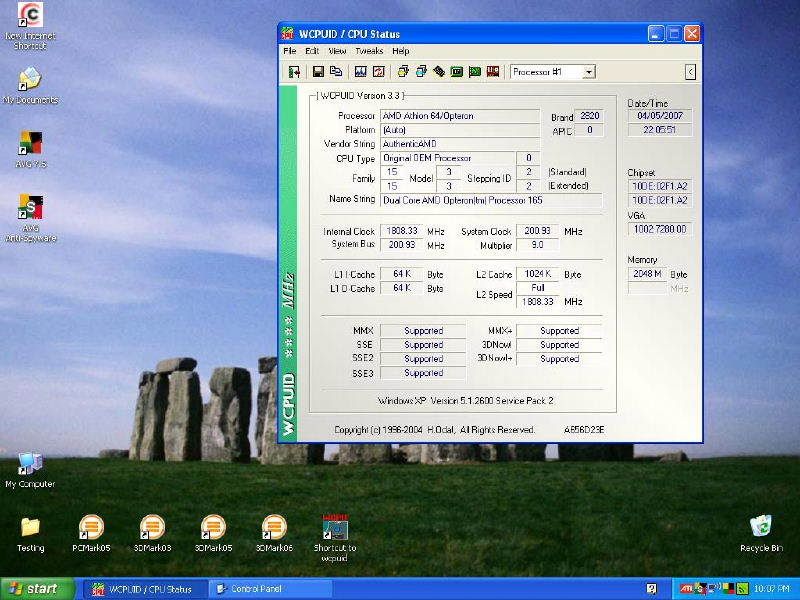
Spent most of this evening loading up drivers and misc. programs that should help me with testing and ultimately ocâing. One thing I did notice is one of my old faithfuls is out in the rain because it seems MBM5 does not support this mobo?!? So is fan speed and temps monitored elsewhere?
For fun 3Dmarks â03 = 14802, 3Dmarks â05 = 8897, & 3Dmarks â06 = 5220, and ran PCMarks â05 but was suffering from some driver issues so = meaningless.
So now it is time to pay attention to the manual and figure out what all the little things are for ocâing as there is a lot more to play with than I was used to with the Chaintech 7NIL1 socket A!
04/06/07 in the wee hours
Started playing with the bios and learned something real fast >> âLive Updateâ can get you a** in trouble and âIntegrated Flash Programâ (I.F.P.) can save it! While checking out the update function, it appeared that I fubarâed the bios (quiet ud!). However I was able to download the latest version (CU51M811) to a floppy and âflashâ it through I.F.P. It was so easy I decided to flash a beta version from Rebel Haven Biostar Forum (CU51M811) that seemed to add a lot of extra settings. The only problem was it appeared to cause fan data to disappear while using the smart fan function and would boot the system when I clicked on the âimageâ. This required me to go back to the standard version.
Attempted some suggested setting from Rebel Haven and amdmb (http://forums.pcper.com/showthread.php?t=417506 ) but ended up with âcmos jumper timeâ. The sandman is beating me with a 50-pound bag so going to call it quits for now.
04/06 Later in the day â 09/07
It seems Iâm fighting an inner ear issue and am devoting my time between walking around like a drunken sailor or hugging the floor. If and when this gets stabilized will be asking some noob questions for sure on how to get going on ocâing this thing. It seems the 939 setup requires a wee bit more thought than the old Skt. A!
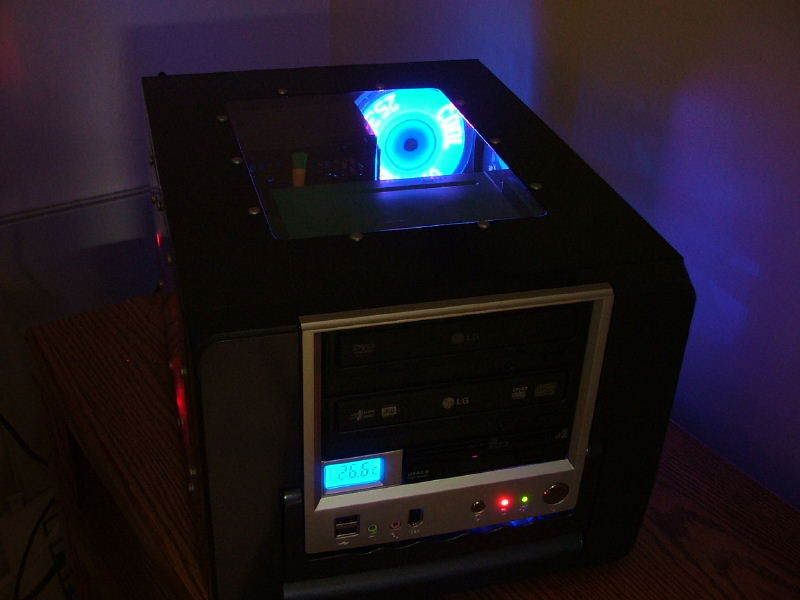
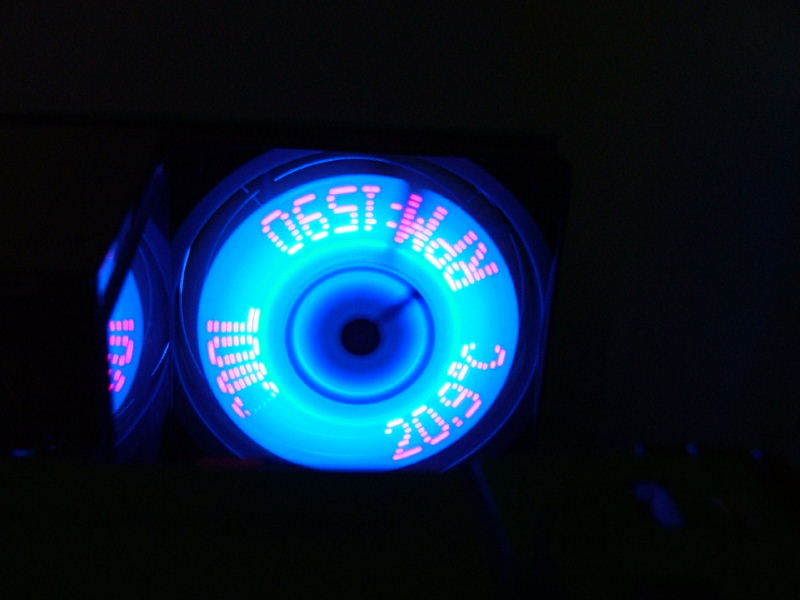
With bobing head and moving keyboard Iâll leave you with a few pictures of it together and running. First in the light
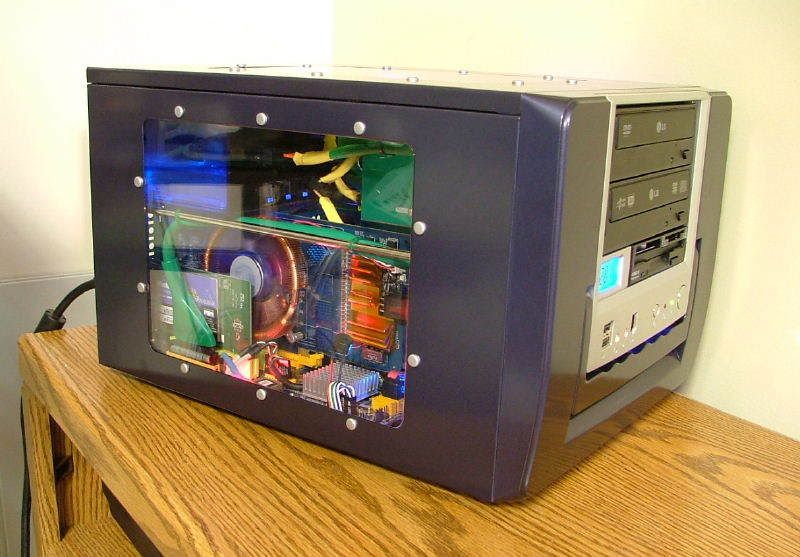 
And in the dark
 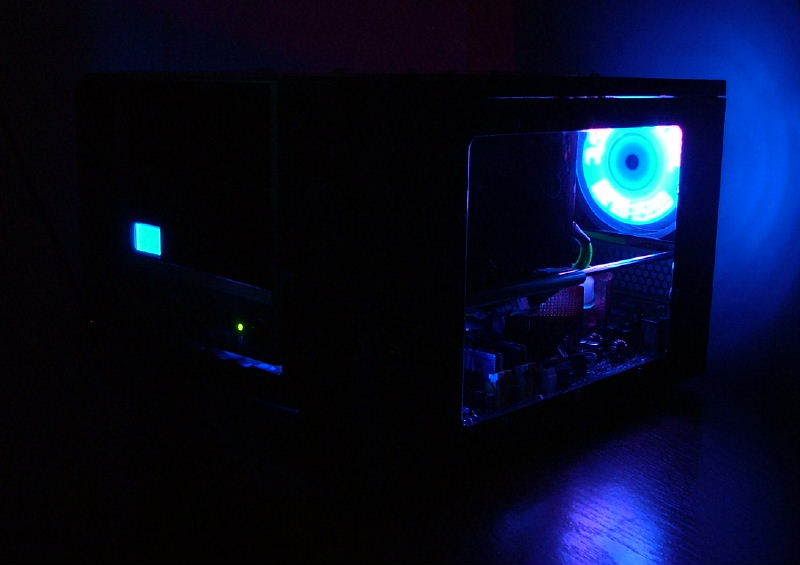 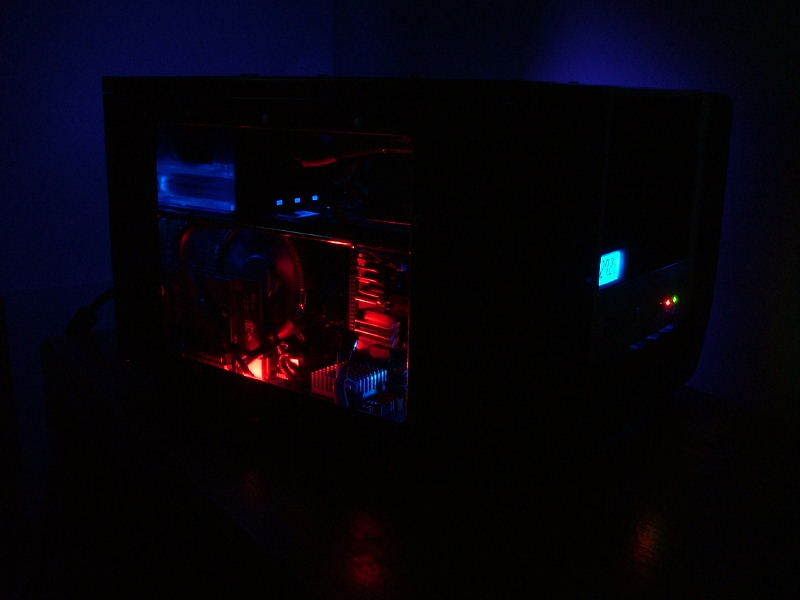
And for fun a couple of the bluegears fan, the lettering is more red though.
 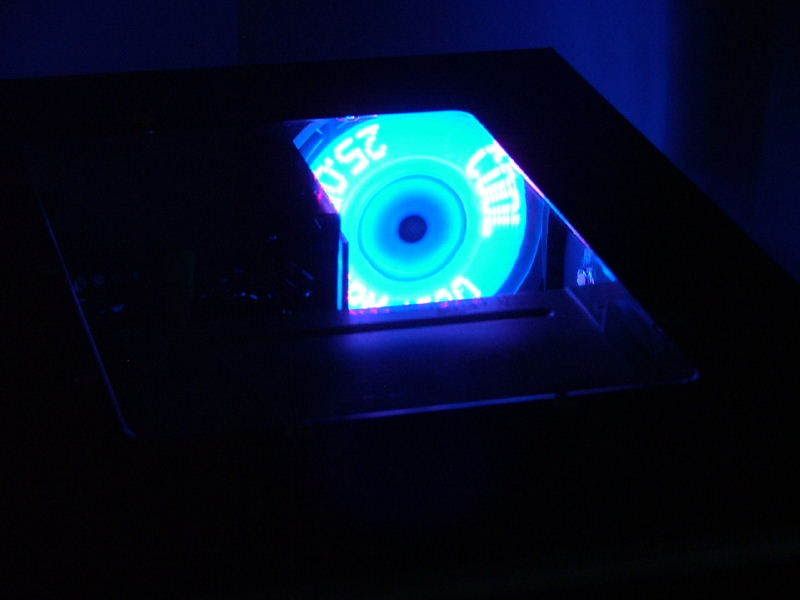
Second shot is through the top window.
Need to go crash now get to see doc #3 tomorrow!
04/10/07
While I'm not wobbling too much, here are a couple of my "bling" disappointments (as you know that always makes it go faster!).
1. Thought the zalman cooler on the Sapphire was a VF900-cu LED
2. The acrylic cover was supposed to have been a more translucent blue (allowing more of the led fan to show through.
3. I think one or two of the leds in the fan have borked.
4. The 120mm fan is so bright it overpowers the CNPS7000B-Cu.
5. The interior just doesnât âglowâ if you know what I mean.
As it is running now I really donât want to touch it. However down the pike I guess I could always replace the GPU HSF, rip the cover off and replace it (if available), and check the PSU fan.
As for now the only exterior âblingâ plans are to come up with graphics for the windows that fit the reference to a distant ancestry. Want to take the time to do research on this and not âHollywoodizeâ it if you now what I mean.
So for the rest of the year I was attempting to OC DreamCatcher and in the process ended up going from the Opty 165, to a 175, and ended up with a 170. If there is an interest in how that session went let me know and I do the thread. 
DreamCatcher v2.0 came about when I started changing things around that involved 2 other builds, a desire to water cool, and getting into the realm of AM2.
Last edited by jedihobbit on Sun, 06 Apr 2008 11:18:09; edited 2 times in total |
|
| Back to top |
|
|
Doctor Feelgood
Arrrrghh!

Joined: 07 Apr 2003
Posts: 20352
Location: New Jersey
|
|
| Back to top |
|
|
jedihobbit
Rated XXX
Joined: 22 Mar 2007
Posts: 238
Location: Central Virginia, USA
|
| Posted: Fri, 04 Apr 2008 18:00:39 Post Subject: |
|
|
Have to admit it was a bit long!  |
|
| Back to top |
|
|
SUSHRUKH
Rated NC-17
Joined: 28 Jan 2007
Posts: 137
|
| Posted: Sun, 06 Apr 2008 09:46:14 Post Subject: |
|
|
Another nice build.Very cute looking & well explained.  |
|
| Back to top |
|
|
|
|
You cannot post new topics in this forum
You cannot reply to topics in this forum
You cannot edit your posts in this forum
You cannot delete your posts in this forum
You cannot vote in polls in this forum
You cannot attach files in this forum
You cannot download files in this forum
|
|

