|
 Posted: September 15, 2003 Posted: September 15, 2003
Author: Spire
Manufacturer: Zalman
Sponsor: Jab-Tech
As part of Zalman’s CNPS system (Computer Noise Prevention System), the ZM80C-HP will keep your ATI Radeon or Nvidia based video card whisper silent and looking very high tech. With the optional ZM-OP1 fan mounted to the heatsink, the assembly can even provide a cooling solution for overclockers. There are few products on the market that can give the inside of your PC the ”Oh My God” shock value quite like the ZM80-HP. The folks with case windows and 80 gigawatts of lights will also dig the eye candy.
Part 1, First Impressions:
|
|
|
Heatpipe cooler & optional fan
|
|
After pulling the chainsaw and blowtorch out to get through the standard well-packaged bubble plastic, I was immediately blown away by the number of pieces and parts included with the ZM80C-HP. There are two formidable heatsinks, 2 blocks labeled front and 2 labeled back, of course there is the golden heatpipe itself, and the kit even includes a Philips screwdriver for installation. But the biggest surprise is the little bag labeled “Spare Parts”. It is almost identical to the little bag labeled “Assembly Parts” but has only those parts you may need to install the ZM80C-HP on your next video card. A very nice touch which will stretch your $26.95 investment even further.
Part 2, Assembly:
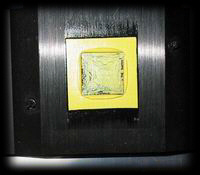
Removing the stock Radeon heatsink proved to be no more of a challenge than pulling the little plastic pins out and giving a gentle little twist. The fan power connector on the other hand, was a bit more of a pain; the whole 2-piece connector came off the board and left just two pins. No big deal, I just separated the halves and pressed the unwired one back over the pins. I was rewarded by my first look at the R300 GPU, with almost no thermal contact to its factory sink. Notice how most of the yellow thermal pad stayed on the sink.
 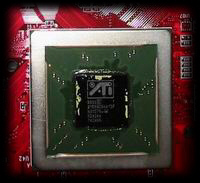
After a bit of denatured alcohol and Q-Tip action, the core turned out to be like a mirror. I wish CPUs were this nice (Notice the reflection of the camera):
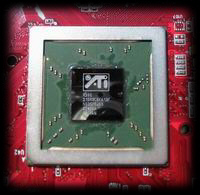
Opting not to use one of the two included white thermal compound tubes (one for now and one for later), I broke out my prized tube of Arctic Silver 3, and slathered the once shiny R300 and lightly buttered the block.
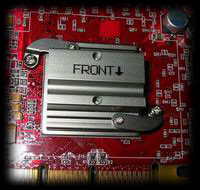
Following the incredible instruction book (great pictures!!!), I selected one of the two GPU blocks. Yes, the ZM80C-HP comes with blocks for ATI products as well as Nvidia. No one is left out here. After a little adjusting, the block labeled “Front” was installed on the R300. Make sure the arrow points to the gold card edge.
Next, the block labeled “Back” gets a clear plastic sticker applied to it, two stickers are included one for the small back block and one for the large. The sticker is there to keep from shorting out any components on the back of the board. Once the sticker is in place, the block gets bolted to the screws that protrude from the front block. The back block floats in air, there is 1/8” between the board and the block. There are rubber o-rings to protect the board on both sides where the screws pass through.
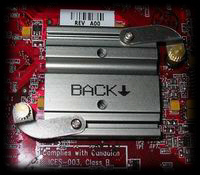
The heatpipe slots and the top most parts of both blocks get a little more Arctic Silver action and then the ‘pipe is placed in its slot. The two big sinks are labeled just like the blocks already installed. I buttered the contact surfaces of both and then screwed them down.
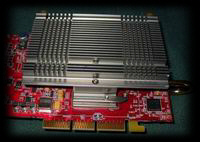
Then come the little supports. They are just slipped into the tracks on both the big heatsinks.
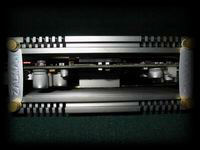
Then comes the Zalman optional fan, ZM-OP1 (available from Jab-Tech for $9.95 more). It is installed the same way the supports are. The fan is packaged with a nice little 4 pin Molex to (2) 5 volt fan and (2) 12 volt fan adapter. I wouldn’t attempt to plug the slim 80mm fan into the video card fan port, the power requirements of the new fan are going to be too much for the board.
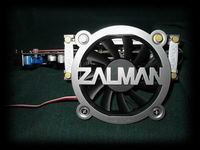
Installation doesn’t take too much time or effort, but there are many mistakes that can be made if you aren’t paying attention. The instruction manual is one of the most complete, well written books I have come across. It really is a book, staple bound, glossy cover and many pages. There are not only illustrations of what it should look like during construction, but even what it shouldn’t look like. Read through and there will be no second-guessing going on.
One very important note, this thing makes a simple video card huge, I mean massive, not only do you lose the PCI slot next to your AGP slot, but for the most part the PCI next to that may be tight too. You Lan Party fanatics might want to reconsider, too. At 325 grams, this thing is heavy. Although well held on, both to the card and the card to the PC, I wouldn’t recommend transporting your PC in any but the motherboard up position. Better yet, a master customizer could come up with a simple little brace for the upper back end of the video card and take it on safari if ever necessary.
Please read on to page 2 for testing and the conclusion... Next
Page 1 | Page 2 | Review Index
|