| OCZ PowerStream 600W ATX Power Supply - Page 3 of 4 |
Installation:
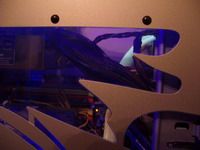
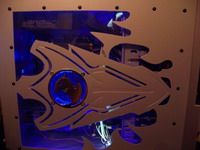
Installation of the PSU was fairly normal; however I would have liked to have more SATA connections instead of just two. I also found it was difficult to hide wires because of the thickness of the shielded cables and the location that they come out of the PSUs case.
Voltages (voltage readings were taken using a Fluke 87III multimeter):
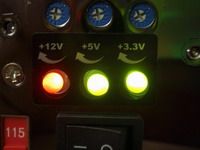
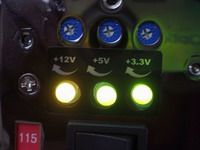
The OCZ PowerStream is equipped with three adjustable voltage rails, these include the 12V, 5V and 3.3V rails. Found on the back of the PSU is three LEDs along with three potentiometers for voltage adjustment from the outside of the case. The LEDs are tri-colored to allow voltage warnings for both over and under voltage. An over voltage will turn the corresponding LED red and an under voltage will turn the LED yellow. A green LED indicates a voltage within tolerance.
Before making any adjustment to the voltages I first tested the out of box (pre-installation) settings to see how close the 12V, 5V, and 3.3V adjustable rails were. The findings are as follows: 12.28V, 5.17V and 3.39V, not too bad for a starting place. Before placing any load on the power supply I adjusted all of the rails to exactly 12.00V, 5.00V and 3.30V. Shown in the graph below are the minimum and maximum adjustable ranges and the point that the warning lights changed colors.
Testing:
For the sake of comparison I used an Enermax Noisetaker 600W PSU, the dual PCI-e version of the one reviewed here. Both the OCZ and Enermax were tested using the follow system:
Light Load (Idle):
DFI LanParty nF4 SLI-DR Mother Board
AMD Athlon 3000+ @ 300 x 8 (2400MHz)
2 X 6600GT graphics cards
2 x 512 TCCD G. Skill LE Ram
1 X 36GB WD Raptor
2 X 200GB Seagates in RAID 1
NEC 3510A DVD burner
Asus DVD Rom
2 x 120mm fans
2 x 80mm LED fans
2 x 80mm standard fans.
Loaded:
Using the same system above while running 3dmark03, ripping a DVD and transferring 10GB of data from D drive to C drive. I also turned on 2 x 12 CCFLs and used a 120Watt load simulator made by Seasonic, shown in this review.
Please read on to the next page for more... Next
Page 1 | Page 2 | Page 3 | Page 4 | Home | Forum | Review Index
|
|
|
|


